<?xml version="1.0" encoding="utf-8"?>
<?xml-stylesheet href="/xsl/rss-style.xsl" type="text/xsl"?>
<feed xmlns="http://www.w3.org/2005/Atom">
  <title>Keith&#39;s Krazy Web Site</title>
  <subtitle></subtitle>
  <link href="https://www.kcaran.com/feed.xml" rel="self"/>
  <link href="https://www.kcaran.com/"/>
  
    <updated>2026-02-12T00:00:00Z</updated>
  
  <id>https://www.kcaran.com</id>
  <author>
    <name>Keith Carangelo</name>
    <email>kcaran@gmail.com</email>
  </author>
  
    
    <entry>
      <title>Perl/Plack Middleware for Emulating An Apache HTTP Server</title>
      <link href="https://www.kcaran.com/posts/perl-plack-middleware-for-emulating-an-apache-http-server.html"/>
      <published>2026-02-12T00:00:00Z</published>
      <updated>2026-02-12T00:00:00Z</updated>
      <id>https://www.kcaran.com/posts/perl-plack-middleware-for-emulating-an-apache-http-server.html</id>
      <content type="html">
        <![CDATA[
      <p>One of the greatest strengths of the Perl ecosystem is Plack. It provides a super-flexible interface between web servers and Perl web applications. Because of its middleware architecture, it is incredibly easy to compose complex behaviors by snapping together small, focused modules.</p>
<p>Recently, I wanted to create a local testing environment for websites that are normally deployed on the Apache HTTP Server. While there are already some nice <a href="https://perlhacks.com/2026/01/apphttpthis-the-tiny-web-server-i-keep-reaching-for/">plack-based local web servers</a>, I had a laundry list of my own requirements, and nothing quite fit the bill.</p>
<p>In order to solve two of my issues, I created and released two new Plack middleware modules to CPAN.</p>
<h2>Plack::Middleware::DirIndex::Htaccess</h2>
<p>In a standard Apache setup, developers often define default pages other than index.html using the <code>DirectoryIndex</code> directive inside a <code>.htaccess</code> file:</p>
<pre><code class="hljs">$ less <span class="hljs-built_in">gallery</span>/.htaccess
DirectoryIndex <span class="hljs-built_in">gallery</span>.html
</code></pre>
<p>This module is an extension of <code>Plack::Middleware::DirIndex</code>. But first it checks for an .htaccess file and, if it has a DirectoryIndex directive, serve that file as the default. Otherwise, it will serve the global default page if present, which by default is index.html.</p>
<h2>Plack::Middleware::DirListing</h2>
<p>When a directory doesn’t have a default index page, the web server usually generates a file listing. There are Plack implementations for this, including
<a href="https://metacpan.org/pod/Plack::App::Directory">Plack::App::Directory</a> and
<a href="https://metacpan.org/pod/Plack::App::DirectoryIndex">Plack::App::DirectoryIndex</a>. But these act as standalone apps, and I wanted a middleware solution that would only generate a directory listing and not serve any other files.</p>
<p>If the request is a directory, <code>Plack::Middleware::DirListing</code>
generates a rich, HTML-formatted listing of the directory contents, complete with last modified dates, file sizes, and file types. It also includes sorting functionality (by name, date, etc.).</p>
<h2>Example Static Site Web Server Implementation</h2>
<p>By combining these two modules, you can build a app.psgi that effectively emulates an Apache server for static sites. This example also includes <code>Plack::Middleware::SSI</code> as I (still) occasionally use server-side includes.  For directories, it checks for a directory index file first first and falls back to a directory listing if none are found. Otherwise, it serves static files if requested.</p>
<pre><code class="hljs"><span class="hljs-comment">#!/usr/bin/env perl</span>
<span class="hljs-keyword">use</span> strict;
<span class="hljs-keyword">use</span> warnings;
<span class="hljs-keyword">use</span> utf8;

<span class="hljs-keyword">use</span> Plack::Builder;
<span class="hljs-keyword">use</span> Plack::Request;

<span class="hljs-keyword">my</span> $app = <span class="hljs-function"><span class="hljs-keyword">sub</span> </span>{
  <span class="hljs-keyword">my</span> $env = <span class="hljs-keyword">shift</span>;

  <span class="hljs-keyword">my</span> $req = Plack::Request-&gt;new( $env );

  <span class="hljs-keyword">my</span> $root = <span class="hljs-string">&#x27;.&#x27;</span>;
  <span class="hljs-keyword">my</span> $status = <span class="hljs-string">&#x27;200&#x27;</span>;
  <span class="hljs-keyword">my</span> $response = <span class="hljs-string">&#x27;OK&#x27;</span>;

  <span class="hljs-keyword">if</span> (! -e <span class="hljs-string">&quot;$root$env-&gt;{ PATH_INFO }&quot;</span>) {
    $status = <span class="hljs-string">&#x27;404&#x27;</span>;
    $response = <span class="hljs-string">&#x27;Not found&#x27;</span>;
   }

  <span class="hljs-keyword">return</span> [
        $status,
        [ <span class="hljs-string">&#x27;Content-Type&#x27;</span> =&gt; <span class="hljs-string">&#x27;text/html; charset=utf-8&#x27;</span> ],
        [ $response ]
        ];
};

builder {
        enable <span class="hljs-string">&#x27;SSI&#x27;</span>;
		enable <span class="hljs-string">&#x27;TrailingSlash&#x27;</span>, <span class="hljs-string">ignore =&gt;</span> [ <span class="hljs-string">&#x27;.htaccess&#x27;</span> ];
		enable <span class="hljs-string">&#x27;DirIndex::Htaccess&#x27;</span>;
		enable <span class="hljs-string">&#x27;DirListing&#x27;</span>;
        enable <span class="hljs-string">&#x27;Static&#x27;</span>, <span class="hljs-string">path =&gt;</span> qr/(css|eot|gif|heic|html|ico|jpe?g|js(?:on)?|pdf|png|svg|swf|txt|ttf|webp|woff2?|xml)/, <span class="hljs-string">root =&gt;</span> <span class="hljs-string">&#x27;.&#x27;</span>;
        $app;
}
</code></pre>
<h2>Available on CPAN</h2>
<p>These modules are available now. If you are looking to mirror your Apache environment locally using the power of Perl, give them a try:</p>
<ul>
<li>
<p><a href="https://metacpan.org/pod/Plack::Middleware::DirIndex::Htaccess">Plack::Middleware::DirIndex::Htaccess</a></p>
</li>
<li>
<p><a href="https://metacpan.org/pod/Plack::Middleware::DirListing">Plack::Middleware::DirListing</a></p>
</li>
</ul>

    ]]>
      </content>
    </entry>
  
    
    <entry>
      <title>A Guide to Building Perl From Source on macOS</title>
      <link href="https://www.kcaran.com/posts/a-guide-to-building-perl-from-source-on-macos.html"/>
      <published>2025-07-30T00:00:00Z</published>
      <updated>2025-07-30T00:00:00Z</updated>
      <id>https://www.kcaran.com/posts/a-guide-to-building-perl-from-source-on-macos.html</id>
      <content type="html">
        <![CDATA[
      <p>This guide explains how I install a clean version of Perl from source on macOS, along with the modules that I use every day.</p>
<p>My philosophy for programming tools is to try to keep things as simple and transparent as possible. I often find that modern package and version managers, while powerful, add layers of complexity I don’t need. I rarely require multiple versions of a programming language on the same machine, and I don’t want to hunt for where my binaries and libraries are located. Instead, I prefer a stable, predictable architecture where I know exactly where to find everything.</p>
<h2>Prerequisites</h2>
<p>This guide assumes you have a basic command-line development environment set up on your Mac. Specifically, you’ll need the <strong>Xcode command line tools</strong> and <strong>Homebrew</strong>, as we’ll use Homebrew to install a couple of dependencies.</p>
<p>If you’re starting from a fresh macOS installation, I recommend following my other guide first: <strong><a href="https://www.kcaran.com/posts/prerequisite-programming-tools-for-macos-xcode-homebrew-and-bash.html">Prerequisite Programming Tools for macOS: Xcode, Homebrew, and Bash</a></strong>.</p>
<p>Once you have Homebrew installed, you’re ready to proceed.</p>
<h2>The Golden Rule: Don’t Touch System Perl</h2>
<p>Before we start, here is the most important rule for using Perl on macOS, which I have learned the hard way:</p>
<pre><code class="hljs"><span class="hljs-strong">****</span><span class="hljs-strong">****</span><span class="hljs-strong">****</span><span class="hljs-strong">****</span><span class="hljs-strong">****</span><span class="hljs-strong">****</span><span class="hljs-strong">****</span><span class="hljs-strong">****</span><span class="hljs-strong">****</span><span class="hljs-strong">****</span><span class="hljs-strong">****</span>
** Do <span class="hljs-emphasis">*not*</span> use the system Perl on MacOS. **
**     It is for Apple, not for you.      **
<span class="hljs-strong">****</span><span class="hljs-strong">****</span><span class="hljs-strong">****</span><span class="hljs-strong">****</span><span class="hljs-strong">****</span><span class="hljs-strong">****</span><span class="hljs-strong">****</span><span class="hljs-strong">****</span><span class="hljs-strong">****</span><span class="hljs-strong">****</span><span class="hljs-strong">****</span>
</code></pre>
<p>Apple includes a version of Perl with macOS for its own system scripts and internal use. You should treat it as part of the operating system, not as a development tool. If you try to install modules to it or modify it, future macOS updates could overwrite your changes or, worse, break system functionality that depends on it. Leaving it alone is the safest and smartest path.</p>
<h2>Why Not Just Use Homebrew?</h2>
<p>The most common way to install packages on macOS is with <a href="https://brew.sh/">Homebrew</a>. So, why not just run <code>brew install perl</code>?</p>
<p>In my experience, installing Perl via Homebrew creates a complex web of symbolic links and version-specific directories (e.g., <code>/opt/homebrew/Cellar/perl/5.38.2/...</code>). This makes it difficult to have a stable, version-agnostic path for my scripts and libraries. Upgrading the Perl version via Brew can sometimes feel like a major migration.</p>
<p>Because Perl is famously backward-compatible, I don’t feel this level of compartmentalization is necessary for my workflow. I prefer to build it from source and install it directly into <code>/usr/local/</code>, just like in the old days. This gives me one predictable location for the Perl binary (<code>/usr/local/bin/perl</code>) and its libraries.</p>
<h2>The Installation Process</h2>
<p>Here are the step-by-step instructions for downloading and compiling Perl from source.</p>
<h3>Step 1: Install Prerequisites</h3>
<p>We’ll need <code>wget</code> to download the source code. If you don’t have it, you can install it with Homebrew.</p>
<pre><code class="hljs language-bash">brew install wget
</code></pre>
<h3>Step 2: Download and Unpack the Perl Source</h3>
<p>Navigate to your Downloads folder, grab the latest stable Perl source code from CPAN, and unpack it.</p>
<pre><code class="hljs"><span class="hljs-comment"># Go to your downloads directory</span>
cd ~/Downloads

<span class="hljs-comment"># Download the source (check cpan.org for the latest version)</span>
$ wget https:<span class="hljs-regexp">//</span>www.cpan.org<span class="hljs-regexp">/src/</span><span class="hljs-number">5.0</span>/perl-<span class="hljs-number">5.40</span>.<span class="hljs-number">0</span>.tar.gz

<span class="hljs-comment"># Unpack the archive</span>
tar -xvzf perl-<span class="hljs-number">5.40</span>.<span class="hljs-number">0</span>.tar.gz 

<span class="hljs-comment"># Change into the new directory</span>
$ cd perl-<span class="hljs-number">5.40</span>.<span class="hljs-number">0</span>/
</code></pre>
<h3>Step 3: Configure the Build</h3>
<p>This is the most important step. We’ll run the Configure script with specific flags to tell it exactly where to install everything.</p>
<pre><code class="hljs">$ Configure -des \
    <span class="hljs-attribute">-Dprefix</span>=/usr/local \
    <span class="hljs-attribute">-Dsitelib</span>=<span class="hljs-string">&#x27;/usr/local/lib/site_perl&#x27;</span> \
    <span class="hljs-attribute">-Dsitelib_stem</span>=<span class="hljs-string">&#x27;/usr/local/lib/site_perl&#x27;</span> \
    <span class="hljs-attribute">-Dsitelibexp</span>=<span class="hljs-string">&#x27;/usr/local/lib/perl5/site_perl&#x27;</span> \
    <span class="hljs-attribute">-Dsitearch</span>=<span class="hljs-string">&#x27;/usr/local/lib/site_perl/&#x27;</span>
    <span class="hljs-attribute">-Dsitearchexp</span>=<span class="hljs-string">&#x27;/usr/local/lib/site_perl/&#x27;</span> \
    <span class="hljs-attribute">-Dinstallsitearch</span>=<span class="hljs-string">&#x27;/usr/local/lib/site_perl/&#x27;</span> \
    <span class="hljs-attribute">-Darchlib</span>=<span class="hljs-string">&#x27;/usr/local/lib/perl5/&#x27;</span> \
    <span class="hljs-attribute">-Dprivlib</span>=<span class="hljs-string">&#x27;/usr/local/lib/perl5/&#x27;</span>
</code></pre>
<p>What do these flags mean?</p>
<ul>
<li>
<p><strong>-des</strong>: A common set of defaults. <code>d</code> uses default answers for configuration questions, <code>e</code> ensures the build continues on its own, and <code>s</code> silences most of the verbose output.</p>
</li>
<li>
<p><strong>-Dprefix=/usr/local</strong>: This is the master key. It sets the main installation directory to <code>/usr/local</code>. The Perl binary will be installed at <code>/usr/local/bin/perl</code>.</p>
</li>
<li>
<p><strong>-Dprivlib</strong> &amp; <strong>-Darchlib</strong>: These flags define where Perl’s standard library files will go. We’re pointing them to a clean <code>/usr/local/lib/perl5</code> directory.</p>
</li>
<li>
<p><strong>-Dsitelib</strong> &amp; <strong>-Dsitearch</strong>: These define where add-on CPAN modules will be installed. We’re pointing them to a subdirectory, <code>/usr/local/lib/perl5/site_perl</code>, to keep them separate from the core library.</p>
</li>
</ul>
<h3>Step 4:  Build, Test, and Install</h3>
<p>Now we compile the source code, run the built-in tests to ensure everything works correctly, and finally, install it.</p>
<pre><code class="hljs"><span class="hljs-comment"># Compile the source code. This can take a few minutes.</span>
<span class="hljs-variable">$ </span>make

<span class="hljs-comment"># Run the test suite. This is crucial to ensure the build is stable.</span>
<span class="hljs-variable">$ </span>make test

<span class="hljs-comment"># Install the compiled files into /usr/local/.</span>
<span class="hljs-comment"># We use `sudo` because we are writing to a system-protected directory.</span>
<span class="hljs-variable">$ </span>sudo make install
</code></pre>
<p>After this, you should close and reopen your terminal. You can verify the new Perl is your default by running which perl, which should now output /usr/local/bin/perl.</p>
<h2>Essential Tools: cpanm and ack</h2>
<p>With Perl installed, the next step is to install <code>cpanm</code>, a fast and friendly client for installing modules from CPAN. We’ll also install ack, a fantastic code-searching tool written in Perl that acts as a better grep.</p>
<pre><code class="hljs"><span class="hljs-comment"># Install cpanm (cpanminus)</span>
curl -L https:<span class="hljs-regexp">//</span>cpanmin.us | perl - --sudo App::cpanminus

<span class="hljs-comment"># Use our new cpanm to install ack</span>
sudo cpanm App::Ack
</code></pre>
<h2>My Commonly Used Perl Modules</h2>
<p>Here are a few of the modules I install on every new machine.</p>
<pre><code class="hljs"><span class="hljs-comment"># For classic web scripting and handling parameters</span>
<span class="hljs-variable">$ </span>cpanm --sudo <span class="hljs-title class_">CGI</span>

<span class="hljs-comment"># A modern, simple API for file and directory manipulation</span>
<span class="hljs-variable">$ </span>cpanm --sudo <span class="hljs-title class_">Path</span>::<span class="hljs-title class_">Tiny</span>

<span class="hljs-comment"># A beautiful data dumper for debugging</span>
<span class="hljs-variable">$ </span>cpanm --sudo <span class="hljs-title class_">Data</span>::<span class="hljs-title class_">Printer</span>

<span class="hljs-comment"># A powerful, real-time web framework (and associated tool set)</span>
<span class="hljs-variable">$ </span>cpanm --sudo <span class="hljs-title class_">Mojolicious</span>
</code></pre>
<h2>Improving the Perl Debugger with Readline</h2>
<p>The default Perl debugger is powerful but can be clunky. Installing <code>Term::ReadLine::Gnu</code> gives it command history and better editing capabilities, similar to the standard Bash shell. It depends on the readline library, which we can install with Homebrew.</p>
<pre><code class="hljs"><span class="hljs-comment"># Install the readline library</span>
brew install readline

<span class="hljs-comment"># Install the necessary Perl modules for the debugger</span>
<span class="hljs-variable">$ </span>cpanm --sudo <span class="hljs-title class_">DB</span>::<span class="hljs-title class_">Pluggable</span>
<span class="hljs-variable">$ </span>cpanm --sudo <span class="hljs-title class_">Term</span>::<span class="hljs-title class_">ReadLine</span>::<span class="hljs-title class_">Gnu</span>
</code></pre>
<h2>Setting Up Playwright for Browser Automation</h2>
<p><code>Playwright.pm</code> is a Perl interface to the powerful Playwright browser automation framework from Microsoft. It’s excellent for testing web applications. Setting it up requires a few extra steps because it depends on Nodejs.</p>
<p><a href="https://www.kcaran.com/posts/adding-nodejs-to-macos.html">Here is my post on how to install Nodejs on MacOS</a></p>
<h3>Step 1: Install Node.js Dependencies</h3>
<p><a href="http://Playwright.pm">Playwright.pm</a> is a wrapper around the JavaScript Playwright library, so we need to install it first using npm (the Nodejs package manager).</p>
<pre><code class="hljs"><span class="hljs-comment"># Install the playwright library and its dependencies globally using npm.</span>
<span class="hljs-comment"># The -E flag preserves the environment, which can be important for sudo.</span>
$ sudo -E npm <span class="hljs-keyword">install</span> -g uuid express playwright

<span class="hljs-comment"># Download the browser binaries (Chrome, Firefox, WebKit) that Playwright uses.</span>
$ npx playwright <span class="hljs-keyword">install</span>
</code></pre>
<h3>Step 2: Install the Perl Modules</h3>
<p>Now we can install the Perl modules that interface with Playwright. I’ve had issues in the past with its dependencies, so I install Test2::Harness and Sereal::Encoder separately as a precaution.</p>
<pre><code class="hljs"><span class="hljs-variable">$ </span>cpanm --sudo <span class="hljs-title class_">Test2</span>::<span class="hljs-title class_">Harness</span>
<span class="hljs-variable">$ </span>cpanm --sudo <span class="hljs-title class_">Sereal</span>::<span class="hljs-title class_">Encoder</span>
<span class="hljs-variable">$ </span>cpanm --sudo <span class="hljs-title class_">Playwright</span>
</code></pre>
<p>And that’s it! You now have a clean, robust, and predictable Perl environment on your Mac, ready for development.</p>

    ]]>
      </content>
    </entry>
  
    
    <entry>
      <title>Adding Nodejs to MacOS</title>
      <link href="https://www.kcaran.com/posts/adding-nodejs-to-macos.html"/>
      <published>2025-07-29T00:00:00Z</published>
      <updated>2025-07-29T00:00:00Z</updated>
      <id>https://www.kcaran.com/posts/adding-nodejs-to-macos.html</id>
      <content type="html">
        <![CDATA[
      <p>There are many ways to install Node.js on MacOS, such as nvm or homebrew, but I’ve always preferred a direct, manual approach. For me, this method gives you complete control, involves no extra package managers, and makes upgrades transparent and simple.</p>
<p>This guide will walk you through manually installing Node.js on macOS (and the same principles apply to Linux).</p>
<h3>Why Install Manually?</h3>
<p>Before we dive in, why avoid the popular tools?</p>
<ul>
<li>
<p><strong>nvm (Node Version Manager):</strong> Excellent for projects that require you to switch between different Node.js versions frequently. However, it adds a small amount of overhead to your shell’s startup time and can be overkill if you just need one version.</p>
</li>
<li>
<p><strong>Homebrew:</strong> A fantastic package manager for macOS, but it comes with its own dependencies and update cycles. Installing Node.js manually keeps it isolated from your other Homebrew-managed tools.</p>
</li>
<li>
<p><strong>Official Installer:</strong> This works well, but it’s a “black box.” It runs scripts and places files on your system without you seeing exactly what’s happening.</p>
</li>
</ul>
<p>The manual method has the advantages of <strong>simplicity and control</strong>. You know exactly where the files are, and there are no other tools to manage.</p>
<h3>Step 1: Download the Binaries</h3>
<p>Download the pre-built binaries from the official Node.js website. “Pre-built” means the code is already compiled for your machine, so you don’t need to build it from source.</p>
<p><strong><a href="https://nodejs.org/en/download">Go to the Node.js Downloads Page</a></strong></p>
<p>Look for the <strong>“Standalone Binary (.gz)”</strong>. You’ll need to choose the right version for your Mac’s architecture:</p>
<ul>
<li><strong>ARM64:</strong> For newer Macs with Apple Silicon (M1, M2, M3, etc.).</li>
<li><strong>x64:</strong> For older Macs with Intel processors.</li>
</ul>
<p>This will download a file like <code>node-v20.16.0-darwin-arm64.tar.gz</code> into your <code>Downloads</code> folder.</p>
<h3>Step 2: Install Node.js</h3>
<p>Now, we’ll unpack the archive and copy the files to <code>/usr/local</code>, a standard directory for user-installed software on macOS and other Unix-like systems. Placing the files here ensures that the <code>node</code> and <code>npm</code> commands are available in your terminal’s <code>PATH</code>.</p>
<p>Open your terminal and run the following commands.</p>
<p><strong>Remember to replace the version number and architecture with the file you downloaded!</strong></p>
<pre><code class="hljs"><span class="hljs-meta prompt_"># </span><span class="language-bash">Navigate to your Downloads folder <span class="hljs-built_in">where</span> the file was saved</span>
<span class="hljs-meta prompt_">$ </span><span class="language-bash"><span class="hljs-built_in">cd</span> ~/Downloads</span>
<span class="hljs-meta prompt_">
# </span><span class="language-bash">Unpack the archive (your filename will vary)</span>
<span class="hljs-meta prompt_">$ </span><span class="language-bash">tar xvf node-v20.16.0-darwin-arm64.tar</span> 
<span class="hljs-meta prompt_">$ </span><span class="language-bash"><span class="hljs-built_in">cd</span> node-v20.16.0-darwin-arm64/</span>
<span class="hljs-meta prompt_">
# </span><span class="language-bash">Copy the directories into /usr/local</span>
<span class="hljs-meta prompt_"># </span><span class="language-bash">The <span class="hljs-string">&#x27;sudo&#x27;</span> <span class="hljs-built_in">command</span> is needed because /usr/local is a system-protected directory.</span>
<span class="hljs-meta prompt_"># </span><span class="language-bash">The <span class="hljs-string">&#x27;-a&#x27;</span> flag on <span class="hljs-string">&#x27;cp&#x27;</span> preserves the file structure and permissions.</span>
<span class="hljs-meta prompt_">$ </span><span class="language-bash">sudo <span class="hljs-built_in">cp</span> -a bin /usr/local</span>
<span class="hljs-meta prompt_">$ </span><span class="language-bash">sudo <span class="hljs-built_in">cp</span> -a include /usr/local</span>
<span class="hljs-meta prompt_">$ </span><span class="language-bash">sudo <span class="hljs-built_in">cp</span> -a lib /usr/local</span>
<span class="hljs-meta prompt_">$ </span><span class="language-bash">sudo <span class="hljs-built_in">cp</span> -a share /usr/local</span>
</code></pre>
<h3>Step 3: Verify the installation</h3>
<p>Check that node and npm are working correctly.</p>
<pre><code class="hljs">$ <span class="hljs-keyword">node</span> <span class="hljs-title">--version</span>
v20.<span class="hljs-number">16.0</span> 

$ npm --<span class="hljs-keyword">version</span>
<span class="hljs-number">10.8</span>.<span class="hljs-number">1</span>
</code></pre>
<p>If you see the version numbers, congratulations! Node.js is installed.</p>
<h3>Managing Global npm Packages</h3>
<p>To install global NPM packages, I use the -E flag with sudo to preserve the user environment, which can help prevent certain permission errors.</p>
<pre><code class="hljs"><span class="hljs-comment"># Example: installing node-sass globally</span>
$ sudo -E npm install -g --unsafe-perm <span class="hljs-keyword">node</span><span class="hljs-title">-sass</span>
</code></pre>
<h3>Upgrading</h3>
<p>To upgrade <code>node</code>, first remove the installed version, and then repeat
the steps above:</p>
<pre><code class="hljs">$ sudo -E rm -rf <span class="hljs-regexp">/usr/</span>local<span class="hljs-regexp">/bin/</span>node <span class="hljs-regexp">/usr/</span>local<span class="hljs-regexp">/bin/</span>npm <span class="hljs-regexp">/usr/</span>local<span class="hljs-regexp">/bin/</span>npx <span class="hljs-regexp">/usr/</span>local<span class="hljs-regexp">/include/</span>node <span class="hljs-regexp">/usr/</span>local<span class="hljs-regexp">/lib/</span>node_modules <span class="hljs-regexp">/usr/</span>local<span class="hljs-regexp">/share/</span>doc<span class="hljs-regexp">/node /u</span>sr<span class="hljs-regexp">/local/</span>share<span class="hljs-regexp">/man/m</span>an1/node.<span class="hljs-number">1</span>
</code></pre>

    ]]>
      </content>
    </entry>
  
    
    <entry>
      <title>Compiling GNU Typist (gtypist) on MacOS</title>
      <link href="https://www.kcaran.com/posts/compiling-gnu-typist-gtypist-on-macos.html"/>
      <published>2025-07-28T00:00:00Z</published>
      <updated>2025-07-28T00:00:00Z</updated>
      <id>https://www.kcaran.com/posts/compiling-gnu-typist-gtypist-on-macos.html</id>
      <content type="html">
        <![CDATA[
      <p>A while back, I decided it was time to finally learn how to touch-type. I was never a slow typer, but my hands constantly roamed the keyboard instead of staying in the home position. <a href="https://steve-yegge.blogspot.com/2008/09/programmings-dirtiest-little-secret.html">Inspired by Steve Yegge to do better</a>, I settled on using GNU Typist (the command is gtypist) as my practice partner.</p>
<p>GNU Typist is run from a terminal window, and is fast enough to run under an ssh session. I’ve run it remotely on RHEL and locally on Linux Mint and WSL. I did have some issues when I tried to build it from my Macbook. I forked the project and made some minor changes to the build process. Here is how I got it to build on MacOS:</p>
<h3>Main Prerequisites: xcode, homebrew, and bash</h3>
<p>The first step to compiling gtypist on MacOS is to make sure you have all the tools you’ll need: the Xcode command line tools, homebrew, and a modern version of bash.</p>
<p><a href="https://www.kcaran.com/posts/prerequisite-programming-tools-for-macos-xcode-homebrew-and-bash.html">You can find my guide for installing these tools here.</a></p>
<h3>Install Dependencies</h3>
<p>I use homebrew to install all the dependencies needed to build gtypist.</p>
<pre><code class="hljs">$ <span class="hljs-keyword">brew </span><span class="hljs-keyword">install </span>ncurses
$ <span class="hljs-keyword">brew </span><span class="hljs-keyword">install </span>automake
$ <span class="hljs-keyword">brew </span><span class="hljs-keyword">install </span>gawk
$ <span class="hljs-keyword">brew </span><span class="hljs-keyword">install </span>texinfo
$ <span class="hljs-keyword">brew </span><span class="hljs-keyword">install </span>gengetopt
$ <span class="hljs-keyword">brew </span><span class="hljs-keyword">install </span>xz
$ <span class="hljs-keyword">brew </span><span class="hljs-keyword">install </span>help2man
</code></pre>
<p>A couple of notes:</p>
<ol>
<li>
<p>Make sure you have the most up-to-date versions of all the tools. In particular, I found that using an outdated version of <code>automake</code> (that does not match the C compiler version) will cause the build to fail.</p>
</li>
<li>
<p>As an alternative, I installed the <code>help2man</code> <a href="https://ftp.gnu.org/gnu/help2man/">directly from the GNU source</a>. That utility is actually a Perl script, and I already have a modern version of <code>perl</code> installed on my system. If that doesn’t apply to you, the Homebrew installation will work fine.</p>
</li>
</ol>
<h3>Download and compile gtypist</h3>
<p>I have forked the <a href="https://savannah.gnu.org/git/?group=gtypist">main GNU repository version</a> and made a few minor edits to get the macos build working.</p>
<pre><code class="hljs"><span class="hljs-meta prompt_">$ </span><span class="language-bash">git <span class="hljs-built_in">clone</span> -b macbuild https://github.com/kcaran/gtypist.git</span>
<span class="hljs-meta prompt_">$ </span><span class="language-bash"><span class="hljs-built_in">cd</span> gtypist</span>
<span class="hljs-meta prompt_">$ </span><span class="language-bash">./autogen.sh CFLAGS=<span class="hljs-string">&quot;-I<span class="hljs-subst">$(brew --prefix)</span>/opt/ncurses/include/&quot;</span> LDFLAGS=<span class="hljs-string">&quot;-L<span class="hljs-subst">$(brew --prefix)</span>/opt/ncurses/lib/&quot;</span></span>
</code></pre>
<h3>Test and Install</h3>
<p>You can test-run gtypist directly from the build directory before installing
it for global use.</p>
<pre><code class="hljs"><span class="hljs-meta prompt_">$ </span><span class="language-bash">src/gtypist lessons/gtypist.typ</span>
<span class="hljs-meta prompt_">$ </span><span class="language-bash">sudo make install</span>
</code></pre>
<p>And that’s it! You now have a working version of GNU Typist installed on your Mac. To start a lesson, just run gtypist from your terminal. Happy typing!</p>

    ]]>
      </content>
    </entry>
  
    
    <entry>
      <title>Prerequisite Programming Tools for MacOS: Xcode, homebrew, and bash</title>
      <link href="https://www.kcaran.com/posts/prerequisite-programming-tools-for-macos-xcode-homebrew-and-bash.html"/>
      <published>2025-07-25T00:00:00Z</published>
      <updated>2025-07-25T00:00:00Z</updated>
      <id>https://www.kcaran.com/posts/prerequisite-programming-tools-for-macos-xcode-homebrew-and-bash.html</id>
      <content type="html">
        <![CDATA[
      <p>Every time I set up a new Mac, I follow a specific process to install my command-line programming tools. My goal is simple: create a development environment that closely mirrors the RHEL web servers I work with daily. This guide outlines that process.</p>
<p>This guide outlines how to install three prerequisites to working from the command line on MacOS: Xcode command line tools, Homebrew, and bash.</p>
<h2>Step 1: Install Xcode Command Line tools</h2>
<p>The absolute first step on any new Mac is to install the Xcode Command Line Tools. This package provides essential developers tools like Git, and compilers like <code>clang</code> and <code>make</code>, which are necessary for building software from source.</p>
<p>Running a git command will automatically prompt you to install them:</p>
<pre><code class="hljs">% git <span class="hljs-comment">--version</span>
</code></pre>
<h3>Pro-Tip: Keeping XCode Tools Up-to-Date</h3>
<p>Over time, these tools can become outdated, especially after a major macOS update. If you run into strange compilation errors, it’s a good idea to reinstall them to get the latest version.</p>
<pre><code class="hljs"><span class="hljs-comment"># First, remove the old tools</span>
<span class="hljs-variable">$ </span>sudo rm -rf /Library/Developer/CommandLineTools
<span class="hljs-comment"># Then, trigger the installation prompt again</span>
<span class="hljs-variable">$ </span>xcode-<span class="hljs-keyword">select</span> --install
</code></pre>
<h2>Step 2: Install Homebrew (Selectively)</h2>
<p>I have a complicated relationship with Homebrew. On one hand, it’s fantastic for quickly installing small utilities and dependencies. On the other, I find it unnecessarily complex for core programming languages that I might want to configure or modify myself.</p>
<p>My rule of thumb is: if I’m ever going to want to compile a tool with non-standard flags or inspect its source, I’ll install it manually. For everything else, Homebrew is fine.</p>
<p>To install Homebrew, run the official command from their website.</p>
<pre><code class="hljs"><span class="hljs-comment"># This command will download and run the installation script.</span>
% <span class="hljs-regexp">/bin/</span>bash -c <span class="hljs-string">&quot;$(curl -fsSL https://raw.githubusercontent.com/Homebrew/install/HEAD/install.sh)&quot;</span>
</code></pre>
<p>One fun aspect (maybe the funnest) of Homebrew is the default location of the files seems to change regularly. According to <a href="">https://docs.brew.sh/Installation</a>, the default install location is <code>/usr/local</code> for Intel binaries and <code>/opt/homebrew</code> for the newer Apple Silicon (M-series).</p>
<h2>Step 3: Upgrade to a Modern Version of Bash</h2>
<p>I’m (probably) too old to learn a new shell, and I don’t want to use different shells when I’m on linux, so <code>bash</code> it is.</p>
<p>Unfortunately, the version of <code>bash</code> that ships with macOS is ancient (version 3.2, from 2007). Apple has avoided updating it due to the more restrictive GPLv3 license of newer versions. This old version lacks critical features like modern tab-completion.</p>
<p>Thankfully, we can install a current version with Homebrew and set it as our default shell. The instructions on this blog post are excellent.</p>
<p><a href="https://www.unindented.org/blog/change-shell-to-latest-bash-on-macos/">https://www.unindented.org/blog/change-shell-to-latest-bash-on-macos/</a></p>
<pre><code class="hljs"><span class="hljs-comment"># 1. Install the latest bash from Homebrew</span>
$ <span class="hljs-keyword">brew </span><span class="hljs-keyword">install </span><span class="hljs-keyword">bash
</span>
<span class="hljs-comment"># 2. Add the new bash to the list of approved shells</span>
<span class="hljs-comment">#    `brew --prefix` correctly finds the Homebrew path (/opt/homebrew or /usr/local)</span>
$ sudo <span class="hljs-keyword">sh </span>-c <span class="hljs-string">&#x27;echo $(brew --prefix)/bin/bash &gt;&gt; /etc/shells&#x27;</span>

<span class="hljs-comment"># 3. Change your user&#x27;s default shell to the new bash</span>
$ chsh -s $(<span class="hljs-keyword">brew </span>--<span class="hljs-keyword">prefix)/bin/bash
</span>
<span class="hljs-comment"># Add this to your .bashrc</span>
export <span class="hljs-keyword">BASH_SILENCE_DEPRECATION_WARNING=1
</span></code></pre>
<h3>Enable bash completion</h3>
<p>Maybe this isn’t necessary?? Brew actually has multiple formulas, but <code>bash-completion@2</code> is compatible with the later versions of bash.</p>
<p>$ brew install bash-completion@2</p>
<p>Then, add the following line to your <code>~/.bash_profile</code> to activate it for every new terminal session:</p>
<pre><code class="hljs"><span class="hljs-comment"># Add to ~/.bash_profile</span>
[ -f $(brew --prefix)<span class="hljs-regexp">/etc/</span>bash_completion ] &amp;&amp; . $(brew --prefix)<span class="hljs-regexp">/etc/</span>bash_completion
</code></pre>
<h2>Install Better Command-Line Utilities</h2>
<p>The default BSD-based versions of some tools on macOS are less feature-rich than their GNU counterparts. I use Homebrew to replace a few of them.</p>
<h3>less and lesskey</h3>
<p>The BSD version of <code>less</code> doesn’t support <code>lesskey</code>, but the Homebrew version is fine. You don’t even have to run <code>lesskey</code> to convert the file to binary anymore!</p>
<pre><code class="hljs">$ brew <span class="hljs-keyword">install</span> <span class="hljs-keyword">less</span>
</code></pre>
<h2>Conclusion</h2>
<p>And that’s it! My Mac now has the basic tools that allows me to set up a simple, stable, and predictable development environment.</p>

    ]]>
      </content>
    </entry>
  
    
    <entry>
      <title>Vim is a Text Editor, Neovim is an IDE</title>
      <link href="https://www.kcaran.com/posts/vim-is-a-text-editor-neovim-is-an-ide.html"/>
      <published>2025-03-27T00:00:00Z</published>
      <updated>2025-03-27T00:00:00Z</updated>
      <id>https://www.kcaran.com/posts/vim-is-a-text-editor-neovim-is-an-ide.html</id>
      <content type="html">
        <![CDATA[
      <p>It’s been on my list for some time to finally start using Neovim and all that it has to offer as an IDE. As an experienced Vim user, it was hard deciding on what path I should take to convert over. Almost by definition, Vi users are all distinct snowflakes and have their preferred tools and methodologies. That makes it hard to choose who’s advice to follow.</p>
<h3>Takeaway</h3>
<p>After trying (and failing) to bolt on the IDE components to my current Vim configuration, I came away with the feeling that I can still use Vim as a text editor, but to use Neovim as an IDE I should start from scratch with one of the pre-configured flavors.</p>
<p>Note that I was successful in porting my current Vim configuration, so it would be possible to use Neovim as my ‘Vim’. But for now I think it is safest (and sanest) to maybe use both in tandem for different types of editing.</p>
<h2>My Process for Installing and Converting to Neovim</h2>
<p>Even though I may scrap my configuration, this is how I tried to install and configure Neovim on my Macbook and on our RHEL 8 web servers.</p>
<h3>Macbook Installation</h3>
<h4>Installation</h4>
<p>Any time I can avoid Homebrew I view it as a win. Fortunately, Neovim comes with pre-built releases for macOS:</p>
<pre><code class="hljs">$ curl -LO https:<span class="hljs-regexp">//gi</span>thub.com<span class="hljs-regexp">/neovim/</span>neovim<span class="hljs-regexp">/releases/</span>download<span class="hljs-regexp">/nightly/</span>nvim-macos-arm64.tar.gz
$ tar xzf nvim-macos-arm64.tar.gz
$ cd nvim-macos-arm64
$ sudo cp -a * <span class="hljs-regexp">/usr/</span>local/
</code></pre>
<p>Running it the first time, Apple complains about all the shared libraries being downloaded from the internet.</p>
<h4>Lua</h4>
<p>This is the first big gotcha I had and I’m still kind of unclear. Neovim has Lua 5.1 embedded inside, so you don’t really need to install it, <strong>UNLESS…</strong> ?? Unless what? The <a href="https://lazy.folke.io/">lazy.nvim</a> package manager suggests that you might need <code>luarocks</code>, which means you would need lua 5.1 installed globally. Oh, and maybe LuaJIT 2.1 (which will automatically build lua?)?</p>
<p>I downloaded lua 5.1 and built in from source and was proud of myself, but now I think I should have tried to use LuaJIT.</p>
<h4>lazy.nvim Package Manager</h4>
<p>My plugin manager of choice on the Vim side is pathogen with a bash script that downloads the plugins from GitHub (or wherever). So using an actual <strong>package</strong> manager was a leap, especially trying to configure it in Lua.</p>
<p>I went back and forth on whether to use a package manager and struggled with the first plugin I tried to import (vim-hexokinase). Fortunately, this was actually the most (only) complicated plugin. Once I had it working, it was smooth sailing.</p>
<p><a href="https://lazy.folke.io/installation">The installation documentation</a> was both straightforward and slightly unclear. I copy-pasted the <code>lazy.lua</code> file, which tripped me up later because it redefined the leader character, but otherwise worked ok. For <a href="https://lazy.folke.io/usage/structuring">defining (structuring?) my plugins</a> I used the <code>~/.config/nvim/lua/plugins.lua</code> file.</p>
<p>The lazy.nvim manager gives you a number of different hooks into the plugins: <code>config</code>, <code>opts</code>, and <code>init</code>. For vim-hexokinase, my woes were I was defining configuration in <code>config</code>, and then <code>opts</code>, but these were both too late in the start-up process.</p>
<pre><code class="hljs"> {
    <span class="hljs-string">&quot;vim-hexokinase&quot;</span>,
    init = <span class="hljs-keyword">function</span>()
       <span class="hljs-keyword">vim</span>.g.Hexokinase_highlighters = { <span class="hljs-string">&#x27;backgroundfull&#x27;</span> }
       <span class="hljs-keyword">vim</span>.g.Hexokinase_palettes = { <span class="hljs-keyword">vim</span>.fn.<span class="hljs-built_in">expand</span>(<span class="hljs-string">&#x27;$HOME&#x27;</span>) .. <span class="hljs-string">&#x27;/environ/safety_colors.json&#x27;</span> }
    end,
 },
</code></pre>
<h4>.vimrc to init.lua</h4>
<p>Finally, I dumped my <code>.vimrc</code> file into an llm and asked it to convert the file to <code>init.lua</code>. It definitely saved me a lot of typing, but it really had trouble converting some strings to lua tables.</p>
<p>I also had to remove a number of stripped “legacy” features. This page was helpful:</p>
<p><a href="https://neovim.io/doc/user/vim_diff.html#_removed-legacy-features">https://neovim.io/doc/user/vim_diff.html#_removed-legacy-features</a></p>
<h2>Attempt at adding IDE features and conclusion</h2>
<p>Unfortunately, attempting to add all the whiz-bang IDE features that made me go on this journey in the first place was not very successful. This was mainly because I was trying to use them on RHEL 8, which is simply too old for it to be a seamless process.</p>
<p>While <code>vim</code> itself works almost everywhere and is extremely stable in that you don’t need to be on the latest version for it to work, Neovim is still in a state of flux. It has much higher aspirations to become a full-fledged IDE complete with AI code completion. This means that breaking changes are inevitable and keeping your software up to date is critical.</p>
<p>While I haven’t given up on using Neovim as an IDE, my next attempt will be on a single platform using a base configuration <a href="https://www.lazyvim.org/">LazyVim seems to fit the bill</a>. Then I’ll gradually add my configuration into it, instead of the other way around.</p>

    ]]>
      </content>
    </entry>
  
    
    <entry>
      <title>Debugging GitHub CI Actions</title>
      <link href="https://www.kcaran.com/posts/debugging-github-ci-actions.html"/>
      <published>2025-03-13T00:00:00Z</published>
      <updated>2025-03-13T00:00:00Z</updated>
      <id>https://www.kcaran.com/posts/debugging-github-ci-actions.html</id>
      <content type="html">
        <![CDATA[
      <p>The GitHub CI Actions for my favorite open-source project, the <a href="https://github.com/shaarli/Shaarli">bookmarking service Shaarli</a>, started failing recently. No one was quite sure why, especially because there hadn’t been any significant updates to the tests, and they passed locally for all the developers who ran them. I had a small pull request that was failing as well, so I <a href="https://www.reddit.com/r/ProgrammerHumor/comments/etboii/the_programmers_credo/">thought I would give fixing the actions a shot</a>.</p>
<p>The first step I took was to try to a print-statement approach on my own fork of the project. This involved making changes on my local machine, pushing them to GitHub, then waiting to see the results of the CI Actions. It got me nowhere. What I really needed was a way to replicate how GitHub ran the actions on my local machine.</p>
<h3>Tools required</h3>
<p>I have access to a few different OS’s locally, but they all had their pros and cons. Ultimately, I used WSL (Ubuntu 22.04) and it worked great. In the future, I might try to replicate the environment on an M1 Mac.</p>
<p>The tool for running GitHub Actions locally is called <a href="https://github.com/nektos/act"><code>act</code></a>. It is written in Golang, so you’ll need to install that first. To install it on WSL I used:</p>
<pre><code class="hljs">$ curl https:<span class="hljs-regexp">//</span>raw.githubusercontent.com<span class="hljs-regexp">/nektos/</span>act<span class="hljs-regexp">/master/i</span>nstall.sh | sudo bash
</code></pre>
<p>You’ll also need Docker. Of course nothing is easy and I went with the <code>docker-ce</code> version. To run Docker as your user (instead of root), add your user to the docker group and log back in.</p>
<pre><code class="hljs"><span class="hljs-variable">$</span> <span class="hljs-built_in">curl</span> <span class="hljs-literal">-fsSL</span> https://download.docker.com/linux/ubuntu/gpg | sudo apt<span class="hljs-literal">-key</span> add -
<span class="hljs-variable">$</span> sudo <span class="hljs-built_in">add-apt</span><span class="hljs-literal">-repository</span> <span class="hljs-string">&quot;deb [arch=amd64] https://download.docker.com/linux/ubuntu <span class="hljs-variable">$</span>(lsb_release -cs) stable&quot;</span>
<span class="hljs-variable">$</span> sudo apt<span class="hljs-literal">-get</span> install docker<span class="hljs-literal">-ce</span>
<span class="hljs-variable">$</span> sudo usermod <span class="hljs-literal">-aG</span> docker <span class="hljs-variable">$USER</span>
&lt;re<span class="hljs-literal">-log-in</span>&gt;
<span class="hljs-variable">$</span> sudo systemctl <span class="hljs-built_in">start</span> docker
<span class="hljs-variable">$</span> docker run hello<span class="hljs-literal">-world</span>
</code></pre>
<h3>Setting up the back-end</h3>
<p>It’s possible to run <code>act</code> with a default docker image, but I found it didn’t perfectly match how the GitHub Actions for Shaarli were run. I created my own Dockerfile with Shaarli’s dependencies. Mostly, I needed to install <code>nodejs</code> for the action to work properly. I also set the user to be ‘runner’, which is the GitHub Actions default user. Otherwise, the action would run under root, which is not what we want.</p>
<p>It made sense to put the Dockerfile under the <code>.github/</code> directory for the project, so I created <code>.github/act/Dockerfile</code>:</p>
<pre><code class="hljs"><span class="hljs-keyword">FROM</span> ubuntu-latest

<span class="hljs-comment"># Install necessary dependencies</span>
<span class="hljs-keyword">RUN</span><span class="language-bash"> apt-get update &amp;&amp; apt-get install -y \
    sudo \
    git \
    curl \
    &amp;&amp; <span class="hljs-built_in">rm</span> -rf /var/lib/apt/lists/*</span>

<span class="hljs-comment"># Get correct version of nodejs</span>
<span class="hljs-keyword">RUN</span><span class="language-bash"> curl -fsSL https://deb.nodesource.com/setup_18.x | sudo -E bash - \
    &amp;&amp; sudo apt install -y nodejs</span>

<span class="hljs-comment"># Create a non-root user (same as GitHub Actions)</span>
<span class="hljs-keyword">RUN</span><span class="language-bash"> useradd -m runner &amp;&amp; \
    <span class="hljs-built_in">echo</span> <span class="hljs-string">&quot;runner ALL=(ALL) NOPASSWD:ALL&quot;</span> &gt;&gt; /etc/sudoers</span>

<span class="hljs-comment"># Set user to &#x27;runner&#x27;</span>
<span class="hljs-keyword">USER</span> runner

<span class="hljs-comment"># Set working directory (GitHub Actions uses this location)</span>
<span class="hljs-keyword">WORKDIR</span><span class="language-bash"> /home/runner</span>

<span class="hljs-keyword">CMD</span><span class="language-bash"> [<span class="hljs-string">&quot;/bin/bash&quot;</span>]</span>
</code></pre>
<p>There was definitely some experimentation required to get Shaarli’s actions running correctly, and I suspect every project has slightly different requirements.</p>
<p>Now, we can build and run the back-end Docker image, which in my case I named ‘shaarli’.</p>
<pre><code class="hljs"><span class="hljs-meta prompt_">$ </span><span class="language-bash">docker build -t shaarli .github/act</span>
<span class="hljs-meta prompt_">$ </span><span class="language-bash">docker images</span>
</code></pre>
<h3>Running act</h3>
<p>Finally, we can use <code>act</code> to run the GitHub Actions locally. We use our docker image (shaarli) instead of ubuntu-latest in the ci.yaml file. The <code>--pull=false</code> argument tells act the docker image is local. The <code>-j</code> option will run a specific job instead of the entire suite.</p>
<pre><code class="hljs">$ act -P <span class="hljs-attribute">ubuntu-latest</span>=shaarli <span class="hljs-attribute">--pull</span>=<span class="hljs-literal">false</span> -j php
</code></pre>
<p>If you want to ssh into the running image to further debug the action, use <code>act --bind</code> to keep it running. Find the container ID and run bash:</p>
<pre><code class="hljs"><span class="hljs-meta prompt_">$ </span><span class="language-bash">docker ps</span>
<span class="hljs-meta prompt_">$ </span><span class="language-bash">docker <span class="hljs-built_in">exec</span> -it 6ffdb /bin/bash</span>
</code></pre>
<h3>Other Docker utilities</h3>
<p>This is definitely an iterative process. Here are some commands for cleaning up the Docker containers and images:</p>
<pre><code class="hljs">$ docker kill  <span class="hljs-constructor">$(<span class="hljs-params">docker</span> <span class="hljs-params">ps</span> -<span class="hljs-params">a</span> -<span class="hljs-params">q</span>)</span>
$ docker rm  <span class="hljs-constructor">$(<span class="hljs-params">docker</span> <span class="hljs-params">ps</span> -<span class="hljs-params">a</span> -<span class="hljs-params">q</span>)</span>
$ docker rmi <span class="hljs-constructor">$(<span class="hljs-params">docker</span> <span class="hljs-params">images</span> -<span class="hljs-params">a</span> -<span class="hljs-params">q</span>)</span>
</code></pre>
<h3>Debugging directly at GitHub</h3>
<p>As a last resort (maybe?), you can even debug actions directly on GitHub using <a href="https://github.com/mxschmitt/action-tmate">action-tmate</a>. Add the following to your ci.yml file:</p>
<pre><code class="hljs">    <span class="hljs-attribute">steps</span><span class="hljs-punctuation">:</span>
    <span class="hljs-bullet">-</span> <span class="hljs-string">name: Setup tmate session</span>
      <span class="hljs-attribute">uses</span><span class="hljs-punctuation">:</span> <span class="hljs-string">mxschmitt/action-tmate@v3</span>
</code></pre>
<p>The Actions details will show a host you can SSH into to get inside the container.</p>
<p>Good luck with your debugging!</p>

    ]]>
      </content>
    </entry>
  
    
    <entry>
      <title>The Perl and Raku Conference 2024 - Las Vegas</title>
      <link href="https://www.kcaran.com/posts/the-perl-and-raku-conference-2024-las-vegas.html"/>
      <published>2024-07-09T00:00:00Z</published>
      <updated>2024-07-09T00:00:00Z</updated>
      <id>https://www.kcaran.com/posts/the-perl-and-raku-conference-2024-las-vegas.html</id>
      <content type="html">
        <![CDATA[
      <p>I was fortunate enough to attend my very first in-person
<a href="https://tprc.us/tprc-2024-las/">Perl conference</a>
this year in Las Vegas!
<a href="https://www.youtube.com/watch?v=AakBK5leleE">Ironically</a> my first real exposure to Perl was almost 30 years (!!) ago when I read
<a href="https://www.amazon.com/Learning-Perl-Making-Things-Possible/dp/1492094951/">Learning Perl</a>
on a plane to Vegas!</p>
<p>It was great to finally meet so many wonderful people that I felt I already knew through using their software and watching conference talks from prior years. Here were the highlights of the conference for me.</p>
<h2 class="video">Party Like It’s 19100+ℯ^iπ – Curtis Poe <a href="https://youtu.be/22-7yP0inu8?si=cWiFQXP2lrGUHDJY">link to video</a></h2>
<p>Ovid started the conference with a keynote that detailed the history of 25 years of Perl conferences. The highlights for me:</p>
<ul>
<li>
<p>His personal experience of 9/11 was deeply moving and a reminder that
even as software developers, our main focus should be on the people we
work with and the people who use our software.</p>
</li>
<li>
<p>If we are to understand complicated systems, we need to understand the
<em>history</em> of how they got to their current state. I run into this all
the time at work: why does this venerable application work the way it does?
Sometimes features are vestigial, obsolete remnants that should be removed, but others might have deep, important reasons for existing.</p>
</li>
<li>
<p>On the controversies surrounding Perl 7 (my paraphrasing):</p>
</li>
</ul>
<blockquote>
<p>I don’t want to moralize but we didn’t need to have that happen.
I know a number of folks who are no longer in the Perl community
because of the abuse.  Attacking our best and brightest is not
the best strategy.</p>
<p>Why is it that hard to be nice?  Why do we have to make fun of
others—other languages, other people, other ideas?
Why do we have to be abusive? It makes me very sad.</p>
</blockquote>
<ul>
<li>
<p>The most important skill when working with AI is prompt engineering.  It is an alchemy that is constantly changing, but it is the most important factor for getting accurate and useful information out of LLMs.</p>
</li>
<li>
<p>It’s always a good reminder of how old some of the versions of Perl are
that people expect to be supported as if they were new. The earliest
version of modern Perl, 5.8, was released in 2004! Even 5.16 was released
in 2012. What other languages are expected to carry such old versions
while trying to improve the language at the same time?</p>
</li>
</ul>
<h2 class="video">Outreachy Updates – Bruce Gray for Makoto Nozaki <a href="https://youtu.be/gCyx7MEt2Jk?si=u3drnVS__Ug-bleD">link to video</a></h2>
<p>Our company has a thriving internship program across multiple business units in an effort to recruit graduates into the insurance industry. I found a lot of parallels with the efforts of The Perl and Raku Foundation. Bruce brought up an excellent point: the hard part of internship programs isn’t finding suitable projects for the interns to work on, it’s finding <strong>mentors to guide the interns</strong>. He estimated the mentors needed five hours per week, and that tracks with my experience. Managing an intern is basically equivalent to managing a regular, full-time employee, and that effort needs to be recognized.</p>
<h2 class="video">Structure Based Structuring of Unstructured Data – Adam Russell <a href="https://youtu.be/dn9msFIED-8?si=IWsqGeCYfp83Tlcu">link to video</a></h2>
<p>Adam Russell’s talk was a terrific primer on how LLMs are affecting the efforts to recognize, categorize, and ultimately use unstructured data. Given a document (or more likely, many many documents) of unknown or inconsistent formatting, how can we read in the data and organize it in a way to make it useful?</p>
<p>He explained the latest research into using LLMs to help automate the semantic knowledge graphs used to organize unstructured data. To me, this is exciting because working with unstructured data is hard! LLMs might be a way to unlock a lot of value from data that is currently opaque.</p>
<h2 class="video">The Test2 Ecosystem – Chad Granum <a href="https://youtu.be/DdSQkIfeoqU?si=SDScDGw2J4s_So8i">link to video</a></h2>
<p>Chad actually gave three talks at the conference, and it’s always great to hear him speak about testing in Perl. The Test2 suite of modules is insanely comprehensive. There seems to be a plugin or some other way to test almost any software. He also previewed the new version of <code>yath</code> (<a href="https://metacpan.org/pod/Test2::Harness">Test2::Harness</a>). Version 2.0 will significantly improve the performance and accessibility of test suites.</p>
<p>Some of the useful plugins and features Chad touched on in his talks include:</p>
<ul>
<li>
<p><a href="https://metacpan.org/pod/Test2::Tools::Compare">Test2::Tools::Compare</a> - Use the <code>is()</code> function instead of Test2::Tools::Basic. It is even being used to validate HTML form and JSON inputs!</p>
</li>
<li>
<p><a href="https://metacpan.org/pod/Test2::API">Test2::API</a> - Gives you hooks to intercept events. It provides the framework for useful debugging tools such as <a href="https://metacpan.org/pod/Test2::Plugin::DieOnFail">Test2::Plugin::DieOnFail</a>.</p>
</li>
<li>
<p><a href="https://metacpan.org/pod/Test2::Tools::Spec">Test2::Tools::Spec</a> - Similar to Ruby’s <code>rspec</code>. It allows you to describe a block of tests and to define code to run before and after the suite or individual tests.</p>
</li>
<li>
<p><a href="https://metacpan.org/pod/Test2::Tools::QuickDB">Test2::Tools::QuickDB</a> can spin up a basic database for your tests.</p>
</li>
<li>
<p>Tests can be rerun from the log files generated by Test2 using <code>yath</code>. You can also use <a href="https://metacpan.org/pod/Test2::Plugin::SRand">Test2::Plugin::SRand</a> to generate “random” numbers repeatedly.</p>
</li>
<li>
<p><a href="https://metacpan.org/pod/Test2::Plugin::UTF8">Test2::Plugin::UTF8</a> is used to turn on UTF8 encoding for test output.</p>
</li>
</ul>
<h2 class="video">YAMLScript and Clojure – Ingy döt ؜Net­<a href="https://youtu.be/RFIukRdFe1o?si=rVb__2IKfsCGX5sL">link to video</a></h2>
<p>Ingy had three talks related to his latest project, <a href="https://yamlscript.org/">YAMLScript</a>, and I was blown away by its potential. It is compelling to think about both from the top down and the bottom up.</p>
<p>From the top down, YAMLScript can serve as a dynamic YAML parser. This will allow you to build custom YAML configuration files, depending on, say, the environment or particular server the configuration file is actually on.  Ingy is striving to make the <code>ys</code> executable the gold standard for parsing YAML, making it unnecessary for other languages to roll their own parsers. It is also a complete and logical scripting language in its own right (with the added benefit that it is <em>fast!</em>).</p>
<p>From the bottom up, YAMLScript compiles down to Clojure, which itself runs on the JVM. This means that with YAMLScript you can reap all the benefits of the vast array of pre-existing Java libraries without actually having to write Java code! Its appeal over Clojure is that its syntax will be more familiar to developers experienced in the C-type languages and their syntax style.</p>
<p>I admit that up to now I’ve favored JSON over YAML when given the choice. But YAML is only growing in popularity and use for configuration of tools such as static site generators. YAMLScript is the catalyst I need to start using YAML more. Also, I would love to be able to generate PDFs using the <a href="https://github.com/LibrePDF/OpenPDF">OpenPDF library</a> without having to resort to writing Java!</p>
<h2 class="video">Playwright-Perl – George S. Baugh <a href="https://youtu.be/ePnKUNW4r8c?si=vYCVtK-Ujlrt71Ps">link to video</a></h2>
<p>In the past I’ve used George’s Selenium::Remote::Driver to run tests against our insured account application and mobile app and he really does yeoman’s work to keep Perl support of Selenium up and running. This talk was the final straw for me and I am going to port all of them to <a href="https://metacpan.org/pod/Playwright">Playwright</a>. I believe the usefulness of his playwright-server utility could extend beyond Perl testing.</p>
<h2 class="video">Actually Portable Perl – Gavin Hayes <a href="https://youtu.be/H3dITR0np54?si=4c3oO7X75qvuD_Vk">link to video</a></h2>
<p>Gavin’s talk was about using <a href="https://computoid.com/APPerl/">Actually Portable Perl</a>
to compile a Perl program (including perl and any necessary modules) into a fully portable executable that can “run anywhere”. There was a palpable excitement about his work by the end of the talk. It’s a bit of a work-in-progress (it uses <a href="https://justine.lol/cosmopolitan/">cosmopolitan libc</a> as the C compiler, which is in active development),
but I would love to be able to run my Perl on any Windows, Mac, or Linux machine.</p>
<h2 class="video">Common-Sense Optimization – D Ruth Holloway <a href="https://youtu.be/8hUEOpzdWxU?si=TfEPlo8Af1Y5NOFn">link to video</a></h2>
<p>Ask yourself what is the cost of <em>not</em> optimizing, and compare it to the estimated time and effort of trying to optimize. Also, what exactly should you be optimizing for? Is it the speed of the application? The amount of resources you need?</p>
<p>Remember the 80/20 principle and make sure you are focusing on the small problems that have a outsized impact.</p>
<p>Robert Heinlein said that proof only comes from experiment. In order to solve optimization problems, you’ll need to get your hands dirty! “You can’t talk it out”. This can apply to life in general, not just coding.</p>
<p>Quote from a young developer: <strong>“I don’t like old people’s code.”</strong> I thought that was hilarious, but I’m not sure who is more right. Older developers need to be cognizant of getting stuck in the way they write code that might be obsolete or just out of fashion (and therefore making it harder for others to work with it). But young developers can be just as stubborn and automatically assume that they know the One True Path for everything.</p>
<h2 class="video">Demystifying Perl One-Liners – Walter C. Mankowski <a href="https://youtu.be/ZqSddysHJb0?si=P5zAzrBCREkd5J5d">link to video</a></h2>
<p>Walt’s talks about Perl one-liners are always excellent and it really should be part of any Perl programmer’s toolkit. I recently read <a href="https://a.co/d/0cUXmCPd">Efficient Linux at the Command Line by Daniel J. Barrett</a>, and more than once I thought, “why the heck would I learn sed or awk to accomplish this???”</p>
<p>One issue that came up near the end of the talk is how to use UTF-8 in one-liners. It turns out to be a little more involved than I expected, but I will post my findings soon!</p>
<h2 class="video">PerlGPT, A Code Llama LLM Fine-Tuned For Perl – William N. Braswell, Jr. <a href="https://youtu.be/Agw6E1omIvY?si=YJ7Q7FEi-fCIsqyA">link to video</a></h2>
<h2>The State of the Onion AI – William Braswell</h2>
<p>Will the Thrill gave two talks on Perl and AI and stressed the importance of getting the Perl community involved in AI projects so the language doesn’t get left behind. One interesting thing I learned is that Google pivoted its TensorFlow project from Python to C, which makes it much easier to create bindings to use its libraries in Perl.</p>
<p>PerlGPT is a specialized model based off of Code Llama trained on a curated set of modules from MetaCPAN. Code Llama Python uses other LLMs to derive the training set. This leads to “garbage-in garbage-out”-type quality issues.</p>
<p>Will maintains that source code is the most complex type of information that is still understandable. The <em>human intention</em> behind the code is necessary for true understanding, and is derived from the documentation and comments.</p>
<p><strong>Code comments and names of functions and variables should capture your intentions</strong></p>
<p><a href="https://perlcommunity.org/ai/">https://perlcommunity.org/ai/</a>
<a href="https://gitlab.com/aiperl/perlgpt"></a></p>
<h2 class="video">Direct Access to PDF Internals with PDF::Data – Deven Corzine <a href="https://youtu.be/fzEWyELP5hI?si=uMdfIdeYJ5V6Es3j">link to video</a></h2>
<p>Every so often we run into issues at work with PDFs, and <a href="https://metacpan.org/pod/PDF::Data">PDF::Data</a> looks incredibly useful for tweaking PDFs programmatically using our language of choice. I can’t wait to try it out!</p>
<p>Refer to the <a href="https://opensource.adobe.com/dc-acrobat-sdk-docs/pdfstandards/PDF32000_2008.pdf">PDF specification</a> for a better understanding of how to manipulate the files!</p>
<h2 class="video">The Once and Future Perl – Damian Conway <a href="https://youtu.be/0x9LD8oOmv0?si=GflzVlcLMwqR0tiY">link to video</a></h2>
<p>Damian’s keynote did not disappoint and it’s hard to watch any presentation of his <em>without</em> coming away with a greater knowledge of Perl. For me and this presentation, it was that it is time for me to start learning how to use <a href="https://perldoc.perl.org/perlsub#Signatures">subroutine signatures</a>.</p>
<p>He gave a couple of examples of how to use <a href="https://metacpan.org/pod/AI::Chat">AI::Chat</a> to embed normal language prompts inside your code, so that the LLM of your choice returns the output you want. This is much different than trying to use the LLM to <em>write code</em> (or help you to write code) that does what you want. It’s an interesting spin on how most developers think about using AI.</p>
<p>Paraphrasing from Brian Kernighan in <em>The Elements of Programming Style</em>: “Debugging is twice as hard as writing the code in the first place. Therefore, if you write the code as cleverly as possible you are - by definition - <strong>not smart enough to debug it.</strong>” This is especially true for AI-generated code. If AI produces code more clever than you could come up with, you will have an especially difficult time tracking down the bugs that will invariably come with the code.</p>
<h2>Wrap-up</h2>
<p>
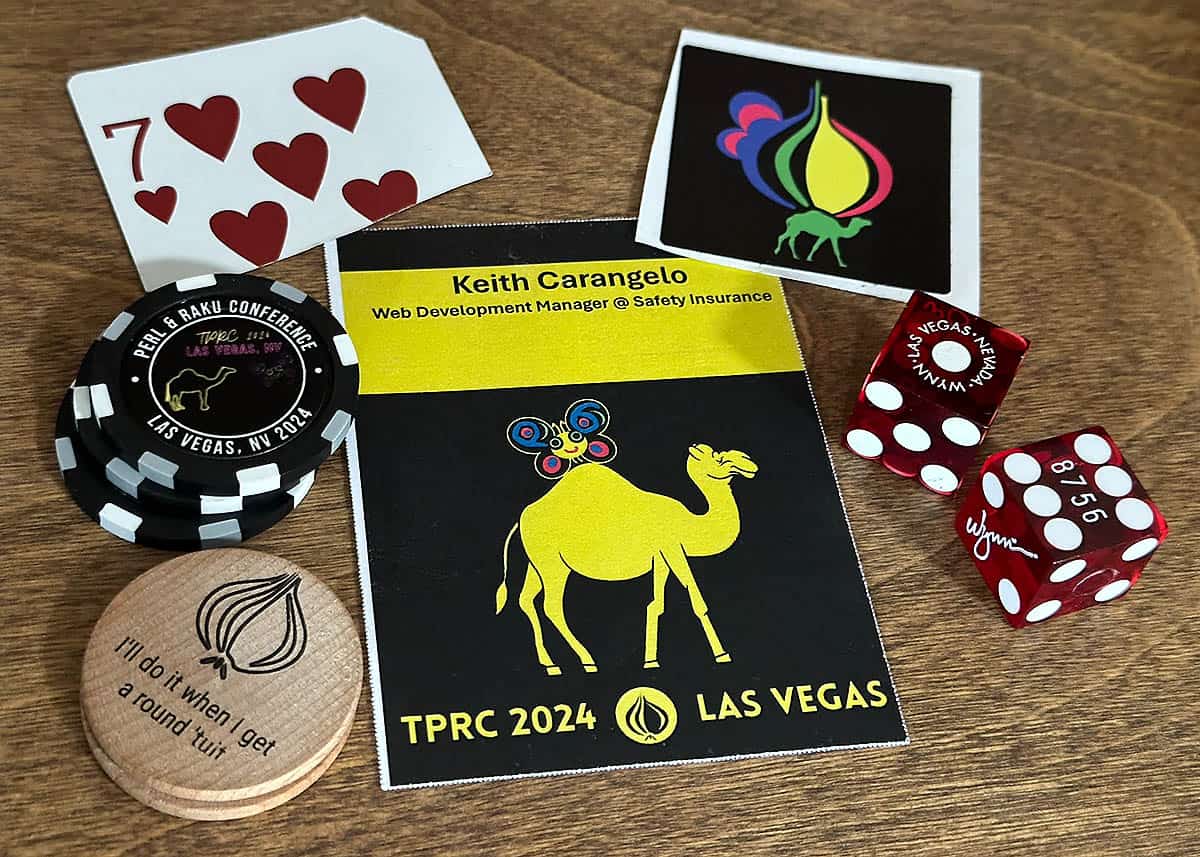
As this post shows, I got so much out of this conference! I am so grateful to <a href="https://x.com/je_turcotte">J.E. Turcotte</a> for his tireless work in making sure that so many videos were posted. There were a few talks that I was unable to attend due to conflicts, and now I’ll be able view them! Peter and Amber Krawczyk did an amazing job finding a <a href="https://www.alexispark.com/">beautiful and appropriate venue</a>, keeping us all fed, and giving us cool Vegas-themed swag!</p>
<p>I’d love to see a few more tracks (i.e. groups of talks on a similar theme). I think it might encourage others to give talks. For example, I wish there had been more talks specifically on web development.</p>
<p>One way that we might be able to encourage more attendees is to have a “beginners track.” Maybe there is a day or two of hands-on classes. Almost everyone I met at the conference was a seasoned pro, and the talks reflected that audience.</p>
<p>I look forward to seeing you all at future Perl events!</p>

    ]]>
      </content>
    </entry>
  
    
    <entry>
      <title>Changelog/JS Party Podcast on Node.js Notes</title>
      <link href="https://www.kcaran.com/posts/changelog-js-party-podcast-on-node-js-notes.html"/>
      <published>2024-02-28T00:00:00Z</published>
      <updated>2024-02-28T00:00:00Z</updated>
      <id>https://www.kcaran.com/posts/changelog-js-party-podcast-on-node-js-notes.html</id>
      <content type="html">
        <![CDATA[
      <p><a href="https://changelog.com/jsparty/294">Episode 294</a> of JS Party is titled <em>Reports of Node’s death are greatly exaggerated</em> and features two members of the Node Technical Steering Committee: Matteo Collina and James Snell. Their perspective on the project (and software development in general) was insightful, especially some of the challenges they face.</p>
<h3>NodeJS Has Backwards-Compatibility Issues</h3>
<p>The Node.js developers have discovered ways of making it much faster, but it would mean changing some of the internals of the project. Some programs developed in Node.js, most notably the <a href="https://expressjs.com/">Express web framework</a>, link directly into those internals and would break if they changed.</p>
<p>The Perl community has the same kind of issues. It’s a recurring thing at conferences to hear the <a href="http://www.faqs.org/docs/perl5int/x108.html">Perl Porters</a> rue that they could clean or speed up the language itself but they don’t want to break working software that was written to rely on those specifics defects.</p>
<p>Backwards compatibility is a high goal to strive for, but it definitely comes with costs.</p>
<p><a href="https://changelog.com/jsparty/294#transcript-140">Link to Transcript</a></p>
<h3>Programming Language Projects Are Best Written in Their Own Language</h3>
<p>For large open-source projects, it’s best to have the majority of the code base written in the <em>lingua franca</em> of the project itself. Node.js is written mainly in JavaScript, not C++. <a href="https://users.rust-lang.org/t/understanding-how-the-rust-compiler-is-built/87237">Rust is written in Rust</a>. The reason is this allows the project to expand the contributer base from the user base. The user base already knows the language of the project, but they might not be as familiar with a lower-level language.</p>
<p><a href="https://changelog.com/jsparty/294#transcript-159">Link to Transcript</a></p>
<h3>C++ May Not Be Your Best Choice</h3>
<p><a href="https://changelog.com/jsparty/294#transcript-159">Matteo Collina</a>:</p>
<p>To be honest, even C is a significant improvement over C++, in my point of view… [laughter] So the bar is pretty low. To be honest, I prefer writing C. I love C code. C is beautiful. C++ gives me a headache half of the time because I don’t know what exactly I’m calling. So it’s really “Oh, is this a method? Is this a function? What is this happening here?” It has so much overloads… But if you look at it with the wrong eye, it just blows, it explodes on top of your face. So everything is better than C++ at this point.</p>
<h3>JavaScript is a Trademark of the Oracle Corporation</h3>
<p><a href="https://tinyclouds.org/trademark">TIL.</a></p>
<blockquote>
<p>The trademark has no commercial value. Other than Oracle’s JavaScript Extension Toolkit, Oracle does not have any products using the trademark and presumably no planned usage. Oracle doesn’t even participate in the development of any of the JavaScript engines like V8, JavaScriptCore, or Spidermonkey. It seems very likely that JavaScript trademark infringement would be unenforceable in court due to non-use.</p>
</blockquote>
<blockquote>
<p>“The trademark is a dark cloud looming over the world’s most popular programming language,” he wrote. “Careful law abiding engineers bend over backwards to avoid its use – leading to confusing terms like ECMAScript.”</p>
</blockquote>

    ]]>
      </content>
    </entry>
  
    
    <entry>
      <title>Excerpts for Eleventy: My Implementation</title>
      <link href="https://www.kcaran.com/posts/excerpts-for-eleventy-my-implementation.html"/>
      <published>2023-10-02T00:00:00Z</published>
      <updated>2023-10-02T00:00:00Z</updated>
      <id>https://www.kcaran.com/posts/excerpts-for-eleventy-my-implementation.html</id>
      <content type="html">
        <![CDATA[
      <p>Converting my relatively basic personal website to Eleventy has shown me how challenging it is to build a static-site generator flexible enough to satisfy all the user cases and requirements. The great thing about Eleventy is being simultaneously opinionated by default and yet extremely flexible and customizable.</p>
<p>One area where everyone seems to have different requirements are reproducing blog post excerpts on the site’s home page. Here are my wants:</p>
<ul>
<li>By default, use the start of the content (up to a delimiter)</li>
<li>Optionally, define the excerpt in the front matter configuration</li>
<li>Markdown is parsed exactly the same as the original post</li>
<li>Include images but allow custom styling on the home page</li>
<li>Syntax highlighting</li>
</ul>
<p>Here is how I implemented each of the requirements.</p>
<h2>Use start of content as the default excerpt</h2>
<p>Eleventy’s built-in excerpting handles grabbing the starting content and putting it into <code>page.excerpt</code>. I use <code>&lt;!-- more --&gt;</code> as the delimiter. It stands out more than <code>---</code> and is easier for me to type than <code>&lt;!-- excerpt --&gt;</code>.</p>
<pre><code class="hljs language-js">eleventyConfig.<span class="hljs-title function_">setFrontMatterParsingOptions</span>({
  <span class="hljs-attr">excerpt</span>: <span class="hljs-literal">true</span>,
  <span class="hljs-comment">// Optional, default is &quot;---&quot;</span>
  <span class="hljs-attr">excerpt_separator</span>: <span class="hljs-string">&#x27;&lt;!-- more --&gt;&#x27;</span>
});
</code></pre>
<h2>Optionally define excerpt using front matter</h2>
<p>If I want to use different content for the excerpt than the start of the post, I include it in the page’s front matter under <code>excerpt</code> using a <a href="https://lzone.de/cheat-sheet/YAML#yaml-heredoc-multiline-strings">YAML HereDoc</a>.</p>
<pre><code class="hljs language-yaml"><span class="hljs-meta">---</span>
<span class="hljs-string">excerpt</span> <span class="hljs-string">|
  ### Heading
  This is an example excerpt with an ![image](/url/image.png)
</span><span class="hljs-meta">---
</span></code></pre>
<p>In the post listing include template, if <code>data.excerpt</code> is present, use it. Otherwise use the page excerpt.</p>
<pre><code class="hljs language-js">&lt;li id=<span class="hljs-string">&quot;{{ post.data.title | slugify }}&quot;</span> <span class="hljs-keyword">class</span>=<span class="hljs-string">&quot;post-list__item&quot;</span>&gt;
...
  &lt;article <span class="hljs-keyword">class</span>=<span class="hljs-string">&quot;post-list__excerpt&quot;</span>&gt;
    {% <span class="hljs-keyword">if</span> post.<span class="hljs-property">data</span>.<span class="hljs-property">excerpt</span> % }
      {{ post.<span class="hljs-property">data</span>.<span class="hljs-property">excerpt</span> | md | safe }}
    {% <span class="hljs-keyword">else</span> %}
      {{ post.<span class="hljs-property">page</span>.<span class="hljs-property">excerpt</span> | md | safe }}
    {% endif %}
  &lt;/article&gt;
  <span class="language-xml"><span class="hljs-tag">&lt;<span class="hljs-name">a</span> <span class="hljs-attr">class</span>=<span class="hljs-string">&quot;post-list__read-more&quot;</span> <span class="hljs-attr">href</span>=<span class="hljs-string">&quot;{{ post.url }}&quot;</span>&gt;</span>read article<span class="hljs-tag">&lt;/<span class="hljs-name">a</span>&gt;</span></span>
&lt;/li&gt;
</code></pre>
<h2>Markdown parsing</h2>
<p>By default Eleventy doesn’t “do” anything with the excerpt content. I expect it to be markdown and parsed accordingly. In my <code>eleventy.config.js</code> file I placed the <code>markdown-it</code> configuration in a function that I can call in two places: one for the standard Eleventy markdown parsing, and the other as a filter that I can use for excerpts:</p>
<pre><code class="hljs language-js"><span class="hljs-keyword">function</span> <span class="hljs-title function_">configureMarkdownIt</span>(<span class="hljs-params"></span>) {
  <span class="hljs-string">&#x27;use strict&#x27;</span>;

  <span class="hljs-comment">// Reference: https://github.com/markdown-it/markdown-it-container/issues/23</span>
  <span class="hljs-keyword">return</span> <span class="hljs-built_in">require</span>(<span class="hljs-string">&#x27;markdown-it&#x27;</span>)({
      <span class="hljs-attr">html</span>: <span class="hljs-literal">true</span>,
      <span class="hljs-attr">linkify</span>: <span class="hljs-literal">true</span>,
      <span class="hljs-attr">typographer</span>: <span class="hljs-literal">true</span>
    })
    .<span class="hljs-title function_">use</span>(<span class="hljs-built_in">require</span>(<span class="hljs-string">&#x27;markdown-it-bracketed-spans&#x27;</span>))
    .<span class="hljs-title function_">use</span>(<span class="hljs-built_in">require</span>(<span class="hljs-string">&#x27;markdown-it-container&#x27;</span>), <span class="hljs-string">&#x27;dynamic&#x27;</span>, {
      <span class="hljs-attr">validate</span>: <span class="hljs-keyword">function</span> (<span class="hljs-params"></span>) { <span class="hljs-keyword">return</span> <span class="hljs-literal">true</span>; },
      <span class="hljs-attr">render</span>: <span class="hljs-keyword">function</span> (<span class="hljs-params">tokens, idx</span>) {
        <span class="hljs-keyword">const</span> token = tokens[idx];
        <span class="hljs-keyword">if</span> (token.<span class="hljs-property">nesting</span> === <span class="hljs-number">1</span>) {
          <span class="hljs-keyword">return</span> <span class="hljs-string">&#x27;&lt;div class=&quot;&#x27;</span> + token.<span class="hljs-property">info</span>.<span class="hljs-title function_">trim</span>() + <span class="hljs-string">&#x27;&quot;&gt;&#x27;</span>;
        } <span class="hljs-keyword">else</span> {
          <span class="hljs-keyword">return</span> <span class="hljs-string">&#x27;&lt;/div&gt;&#x27;</span>;
        }
      }
    })
    .<span class="hljs-title function_">use</span>(<span class="hljs-built_in">require</span>(<span class="hljs-string">&#x27;markdown-it-implicit-figures&#x27;</span>), {
        <span class="hljs-attr">figcaption</span>: <span class="hljs-string">&#x27;title&#x27;</span>,
        <span class="hljs-attr">keepAlt</span>: <span class="hljs-literal">true</span>,
        <span class="hljs-attr">link</span>: <span class="hljs-literal">true</span>
    })
    .<span class="hljs-title function_">use</span>(<span class="hljs-built_in">require</span>(<span class="hljs-string">&#x27;markdown-it-highlightjs&#x27;</span>), {
        <span class="hljs-attr">code</span>: <span class="hljs-literal">true</span>,
        <span class="hljs-attr">inline</span>: <span class="hljs-literal">false</span>
    })
    .<span class="hljs-title function_">use</span>(<span class="hljs-built_in">require</span>(<span class="hljs-string">&#x27;markdown-it-smartarrows&#x27;</span>))
    .<span class="hljs-title function_">use</span>(<span class="hljs-built_in">require</span>(<span class="hljs-string">&#x27;markdown-it-attrs&#x27;</span>));		<span class="hljs-comment">// Should be last</span>
}

  eleventyConfig.<span class="hljs-title function_">setLibrary</span>( <span class="hljs-string">&#x27;md&#x27;</span>, <span class="hljs-title function_">configureMarkdownIt</span>() );

  <span class="hljs-comment">// https://github.com/11ty/eleventy/issues/1380</span>
  eleventyConfig.<span class="hljs-title function_">addFilter</span>( <span class="hljs-string">&#x27;md&#x27;</span>, <span class="hljs-keyword">function</span> (<span class="hljs-params">content = <span class="hljs-string">&#x27;&#x27;</span></span>) {
    <span class="hljs-keyword">let</span> html = <span class="hljs-title function_">configureMarkdownIt</span>().<span class="hljs-title function_">render</span>( content );
    <span class="hljs-keyword">return</span> html;
  });
</code></pre>
<h2>Excerpt images</h2>
<p>On the home page, I might want to include an image from the post, but resize it to better fit in the list of posts.  I may generalize the display of images in excerpts in the future, but for now I rely on the post title to style the images in the excerpt:</p>
<pre><code class="hljs language-css"><span class="hljs-selector-tag">li</span><span class="hljs-selector-id">#regex-is-a-programming-superpower</span> <span class="hljs-selector-tag">article</span> <span class="hljs-selector-tag">img</span> {
    <span class="hljs-attribute">object-position</span>: <span class="hljs-number">0</span> <span class="hljs-number">0</span>;
}
<span class="hljs-selector-class">.post-list</span> <span class="hljs-selector-class">.hero</span> <span class="hljs-selector-tag">img</span> {
    <span class="hljs-attribute">max-height</span>: <span class="hljs-number">300px</span>;
    <span class="hljs-attribute">object-fit</span>: cover;
    <span class="hljs-attribute">width</span>: <span class="hljs-number">100%</span>;
}
</code></pre>
<h2>Syntax highlighting</h2>
<p>This is where I fell down a rabbit hole. Everything worked as I wanted to this point except for the syntax highlighting. <a href="https://github.com/11ty/eleventy-plugin-syntaxhighlight/issues/15">This is a known issue</a>. I messed around with the default syntax highlighting plugin but wasn’t able to implement what I wanted.</p>
<p>In the end, I decided to forego the syntax highlighting plugin entirely and use the <a href="https://www.npmjs.com/package/markdown-it-highlightjs"><code>markdown-it-highlightjs</code></a> plugin instead. It works great, or at least as great as hightlight.js does.</p>
<p>I think the only thing I really lose by going with <code>markdown-it-highlightjs</code> is the baked-in shortcode. But as long as I only want to render markdown, I don’t think this is an issue.</p>

    ]]>
      </content>
    </entry>
  
    
    <entry>
      <title>UTC/Local Date Conversion in Perl With Time::Piece</title>
      <link href="https://www.kcaran.com/posts/utc-local-date-conversion-in-perl-with-time-piece.html"/>
      <published>2023-09-22T00:00:00Z</published>
      <updated>2023-09-22T00:00:00Z</updated>
      <id>https://www.kcaran.com/posts/utc-local-date-conversion-in-perl-with-time-piece.html</id>
      <content type="html">
        <![CDATA[
      <p><code>Time::Piece</code> is my preferred perl module for handling dates. Here is how it can be used to convert between UTC and the local time, even for past dates which may have crossed the current daylight savings time status.</p>
<h2>Assumptions and Restrictions</h2>
<p>Date conversions can be confusing because there are a number of tools used in the process, each with its own quirks (or limitations). So there are the caveats to this process.</p>
<ul>
<li>
<p>The <em>only</em> date formats supported are UTC and the local timezone. The assumption here is if you live in New York, you won’t see dates from California or any other timezone.</p>
</li>
<li>
<p>The dates being converted are in standard ISO format: ‘2015-03-08 06:59:00’.</p>
</li>
</ul>
<h3>Step 1: Format the Date String</h3>
<p>Before passing the date string to Time::Piece, strip off everything after the integer seconds. If you need the milliseconds data, you can re-attach it after conversion. The same applies to any timezone indicators: add them back in after conversion.</p>
<p>Not following this step caused me a lot of confusion in the past. The linux <code>strptime</code> c-function doesn’t do a great job of supporting timezones. You are much better off stripping them off before trying to convert between UTC and local time.</p>
<h3>Step 2: Create a new Time::Piece object using <code>strptime</code></h3>
<p>The <code>strptime</code> function converts a well-formed date string to a Time::Piece object. The trick here is that you use <code>Time::Piece-&gt;strptime()</code> if the date is already in UTC, and you use <code>localtime-&gt;strptime()</code> if the date is a local time.</p>
<h3>Step 3: Convert the date using the epoch seconds</h3>
<p>Use the <code>epoch()</code> function to create a new <code>Time::Piece</code> in the desired timezone. If you want your date in UTC, use <code>Time::Piece-&gt;gmtime( $epoch )</code>. Otherwise, use <code>Time::Piece-&gt;localtime( $epoch )</code> for the local timezone.</p>
<h3>Step 4: Use <code>strftime</code> to create the converted date string</h3>
<p>I always use <code>$tp-&gt;strftime( '%Y-%m-%d %H:%M:%S' )</code> to create a date string from a <code>Time::Piece</code> object, but <code>$tp-&gt;datetime</code> works as well (with a capital T separating the date and time).</p>
<h3>Sample program</h3>
<pre><code class="hljs language-perl"><span class="hljs-comment">#!/usr/bin/env perl</span>
<span class="hljs-comment">#</span>
<span class="hljs-comment"># $Id: $</span>
<span class="hljs-comment">#</span>
<span class="hljs-keyword">use</span> feature <span class="hljs-string">&#x27;:5.16&#x27;</span>;

<span class="hljs-keyword">use</span> strict;
<span class="hljs-keyword">use</span> warnings;
<span class="hljs-keyword">use</span> utf8;
<span class="hljs-keyword">use</span> <span class="hljs-keyword">open</span> <span class="hljs-string">&#x27;:std&#x27;</span>, <span class="hljs-string">OUT =&gt;</span> <span class="hljs-string">&#x27;:encoding(UTF-8)&#x27;</span>;

<span class="hljs-keyword">use</span> Time::Piece;

<span class="hljs-function"><span class="hljs-keyword">sub</span> <span class="hljs-title">utc_to_local</span> </span>{
  <span class="hljs-keyword">my</span> ($utc_ts) = @_;
  $utc_ts =~ <span class="hljs-regexp">s/^(\d{4}-\d{2}-\d{2}).(\d{2}:\d{2}:\d{2}).*$/$1 $2/</span>
        <span class="hljs-keyword">or</span> <span class="hljs-keyword">die</span> <span class="hljs-string">&quot;Illegal date format: $utc_ts&quot;</span>;

  <span class="hljs-keyword">my</span> $utc_tp = Time::Piece-&gt;strptime( $utc_ts, <span class="hljs-string">&#x27;%Y-%m-%d %H:%M:%S&#x27;</span> );
  <span class="hljs-keyword">print</span> <span class="hljs-string">&quot;UTC epoch is   &quot;</span>, $utc_tp-&gt;epoch, <span class="hljs-string">&quot;\n&quot;</span>;
  <span class="hljs-keyword">my</span> $local_tp = <span class="hljs-keyword">localtime</span>( $utc_tp-&gt;epoch );
  <span class="hljs-keyword">return</span> $local_tp-&gt;strftime( <span class="hljs-string">&#x27;%Y-%m-%d %H:%M:%S&#x27;</span> );
}

<span class="hljs-function"><span class="hljs-keyword">sub</span> <span class="hljs-title">local_to_utc</span> </span>{
  <span class="hljs-keyword">my</span> ($local_ts) = @_;
  $local_ts =~ <span class="hljs-regexp">s/^(\d{4}-\d{2}-\d{2}).(\d{2}:\d{2}:\d{2}).*$/$1 $2/</span>
        <span class="hljs-keyword">or</span> <span class="hljs-keyword">die</span> <span class="hljs-string">&quot;Illegal date format: $local_ts&quot;</span>;
  <span class="hljs-keyword">my</span> $local_tp = <span class="hljs-keyword">localtime</span>-&gt;strptime( $local_ts, <span class="hljs-string">&#x27;%Y-%m-%d %H:%M:%S&#x27;</span> );
  <span class="hljs-keyword">print</span> <span class="hljs-string">&quot;Local epoch is &quot;</span>, $local_tp-&gt;epoch, <span class="hljs-string">&quot;\n&quot;</span>;
  <span class="hljs-keyword">my</span> $utc_tp = <span class="hljs-keyword">gmtime</span>( $local_tp-&gt;epoch );
  <span class="hljs-keyword">return</span> $utc_tp-&gt;strftime( <span class="hljs-string">&#x27;%Y-%m-%d %H:%M:%S&#x27;</span> );
 }

<span class="hljs-keyword">my</span> ($utc, $local);

<span class="hljs-comment"># DST not in effect</span>
$utc = <span class="hljs-string">&#x27;2015-03-08T06:59:00.399Z&#x27;</span>;
$local = utc_to_local( $utc );
<span class="hljs-keyword">print</span> <span class="hljs-string">&quot;DST not in effect: utc($utc) = local($local)\n&quot;</span>;

<span class="hljs-comment"># DST is in effect</span>
$utc = <span class="hljs-string">&#x27;2015-03-08 07:00:00Z&#x27;</span>;
$local = utc_to_local( $utc );
<span class="hljs-keyword">print</span> <span class="hljs-string">&quot;DST *is in effect: utc($utc) = local($local)\n&quot;</span>;

<span class="hljs-comment"># DST not in effect</span>
$local = <span class="hljs-string">&#x27;2015-03-08T01:59:00-05:00&#x27;</span>;
$utc = local_to_utc( $local );
<span class="hljs-keyword">print</span> <span class="hljs-string">&quot;DST not in effect: utc($utc) = local($local)\n&quot;</span>;

<span class="hljs-comment"># DST is in effect</span>
$local = <span class="hljs-string">&#x27;2015-03-08T02:00:00-04:00&#x27;</span>;
$utc = local_to_utc( $local );
<span class="hljs-keyword">print</span> <span class="hljs-string">&quot;DST *is in effect: utc($utc) = local($local)\n&quot;</span>;

<span class="hljs-comment"># DST is in effect</span>
$local = <span class="hljs-string">&#x27;2015-03-08T03:00:00-04:00&#x27;</span>;
$utc = local_to_utc( $local );
<span class="hljs-keyword">print</span> <span class="hljs-string">&quot;DST *is in effect: utc($utc) = local($local)\n&quot;</span>;

<span class="hljs-keyword">exit</span>;
</code></pre>
<p>Here is the output of the script. Note that the dates are one minute (60 epoch seconds) apart, but Daylight Savings Time in the Eastern time zone changes the time from 1:59am to 3:00am. Both 2:00am and 3:00am for that day return the same epoch time.</p>
<pre><code class="hljs language-sh">$ perl timezone.pl
UTC epoch is   1425797940
DST not <span class="hljs-keyword">in</span> effect: utc(2015-03-08T06:59:00.399Z) = <span class="hljs-built_in">local</span>(2015-03-08 01:59:00)
UTC epoch is   1425798000
DST *is <span class="hljs-keyword">in</span> effect: utc(2015-03-08 07:00:00Z) = <span class="hljs-built_in">local</span>(2015-03-08 03:00:00)
Local epoch is 1425797940
DST not <span class="hljs-keyword">in</span> effect: utc(2015-03-08 06:59:00) = <span class="hljs-built_in">local</span>(2015-03-08T01:59:00-05:00)
Local epoch is 1425798000
DST *is <span class="hljs-keyword">in</span> effect: utc(2015-03-08 07:00:00) = <span class="hljs-built_in">local</span>(2015-03-08T02:00:00-04:00)
Local epoch is 1425798000
DST *is <span class="hljs-keyword">in</span> effect: utc(2015-03-08 07:00:00) = <span class="hljs-built_in">local</span>(2015-03-08T03:00:00-04:00)
</code></pre>

    ]]>
      </content>
    </entry>
  
    
    <entry>
      <title>Excalidraw: Add Padding Around Exported Image</title>
      <link href="https://www.kcaran.com/posts/excalidraw-add-padding-around-exported-image.html"/>
      <published>2023-09-20T00:00:00Z</published>
      <updated>2023-09-20T00:00:00Z</updated>
      <id>https://www.kcaran.com/posts/excalidraw-add-padding-around-exported-image.html</id>
      <content type="html">
        <![CDATA[
      <p>My favorite app for creating diagrams is <a href="https://excalidraw.com/">excalidraw</a>. It is a free, open-source, web application that has all the features necessary to quickly create almost any kind of workflow image. The user interface is terrific and easily grokked by anyone familiar with drawing apps. You can export images in either SVG or PNG formats.</p>
<p>There was only one thing that bothered me about the app. When images are exported, there is no padding or margins around the image, which can make them hard to work with. I wasn’t the only one with the issue and someone <a href="https://github.com/excalidraw/excalidraw/issues/1556">opened a github issue to discuss possible solutions</a>. In the end, the issue was closed without a resolution, because there didn’t seem to be a generic solution that would please everyone.</p>
<figure><a href="/img/excalidraw/ss01_export_no_padding.png"><img src="/img/excalidraw/ss01_export_no_padding.png" alt="Export image with no padding around diagram"></a><figcaption>Export image with no padding around diagram</figcaption></figure>
<h2>The Workaround: Adding an Invisible Frame</h2>
<p>My solution to this issue is similar to how I <a href="https://www.kcaran.com/posts/svg-files-in-adobe-illustator.html">edit SVG icons in Illustrator</a>. I add an invisible rectangle around the entire image with the amount of padding I want in the exported file.</p>
<figure><a href="/img/excalidraw/ss02_border_frame.png"><img src="/img/excalidraw/ss02_border_frame.png" alt="Adding the invisible frame"></a><figcaption>Adding the invisible frame</figcaption></figure>
<p>The rectangle has a transparent fill and a transparent stroke to make it invisible. Even if you can’t see it, it isn’t difficult to select the rectangle by clicking around the border of the actual image. Once selected, the rectangle can be resized to increase or decrease the amount of padding around the image.</p>
<figure><a href="/img/excalidraw/ss03_frame_resize.png"><img src="/img/excalidraw/ss03_frame_resize.png" alt="Invisible frame selected"></a><figcaption>Invisible frame selected</figcaption></figure>
<p>Now when the image is exported, the invisible frame adds space around the image, making it immediately usable on its own or embedded in documents.</p>
<figure><a href="/img/excalidraw/ss04_export_with_padding.png"><img src="/img/excalidraw/ss04_export_with_padding.png" alt="Export image dialog with padded graphic"></a><figcaption>Export image dialog with padded graphic</figcaption></figure>
<h4>• <a href="/img/excalidraw/export_with_padding.png">Example PNG image with padding</a>.</h4>

    ]]>
      </content>
    </entry>
  
    
    <entry>
      <title>SVG Files in Adobe Illustator</title>
      <link href="https://www.kcaran.com/posts/svg-files-in-adobe-illustator.html"/>
      <published>2023-09-15T00:00:00Z</published>
      <updated>2023-09-15T00:00:00Z</updated>
      <id>https://www.kcaran.com/posts/svg-files-in-adobe-illustator.html</id>
      <content type="html">
        <![CDATA[
      <p>Although it has gotten better over the years, Adobe Illustrator doesn’t automatically produce SVG files completely suitable (or optimal) for websites.</p>
<p>This document is an opinionated process for creating suitable web SVGs. A “suitable web SVG” is one that can be easily and quickly tweaked by a developer by editing the code directly. It is also optimized to make it easy to embed in HTML or CSS files.</p>
<h2>A Gentle Reminder: SVG is Code!</h2>
<p>Unlike binary image file formats, it is possible to edit the code that generates the SVG image directly. At a minimum, you should feel comfortable with opening the SVG file in a text editor and inspecting the contents.</p>
<h2>Editing in Illustrator</h2>
<p>For the best results, the Illustrator output should be as clean as possible which will make any further optimizations easier.</p>
<h3>Step 1 - Edit the Artboard</h3>
<p>We would prefer the SVG’s viewBox to be large enough to support integer paths.  Unfortunately, Illustrator ignores the viewBox and uses the width and height dimensions if you try to edit an existing SVG. So the first step is to contain the image in a suitable viewBox with padding around the actual image.</p>
<p>By convention, make the artboard 960px square. Create two squares: one the full height and width of the artboard (960x960) and another with 40px of padding all around the image (880x880).</p>
<p>Hide these outline squares before saving the image.</p>
<figure><a href="/img/svg_illustrator/figure01.png"><img src="/img/svg_illustrator/figure01.png" alt="Square around artboard and icon"></a><figcaption>Square around artboard and icon</figcaption></figure>
<p>If the image is not square, use 960 as the smaller dimension and scale the larger dimension accordingly. Keep the same 40px padding around the entire image.</p>
<h3>Step 2 - Export the Image as SVG</h3>
<p>Choose <code>File → Export → Export As</code></p>
<p>In the Export window, make sure <code>Use Artboards</code> is checked (and the correct one is selected).</p>
<figure><a href="/img/svg_illustrator/figure02.png"><img src="/img/svg_illustrator/figure02.png" alt="SVG export options"></a><figcaption>SVG export options</figcaption></figure>
<p>For the SVG Options, <code>Styling</code> can either be <code>Internal CSS</code> or <code>Presentation Attributes</code>. If the image is a single color, <code>Presentation Attributes</code> is a little more straightforward to work with. Fonts should almost certainly be converted to outlines. Object IDs can be <code>Minimal</code>.</p>
<p>Unfortunately, in my experiments even with a large artboard Illustrator manages to corrupt the image if less than 2 decimal places are used in the export.</p>
<p>Select <code>Minify</code> but not <code>Responsive</code>.</p>
<figure><a href="/img/svg_illustrator/figure03.png"><img src="/img/svg_illustrator/figure03.png" alt="SVG options dialog"></a><figcaption>SVG options dialog</figcaption></figure>
<h3>Step 3 - Save in Illustrator format!</h3>
<p>Finally, save (a copy) of the image in Illustrator format, either .ai or .eps is fine. Otherwise, you’ll have to go through all the above steps every time you need to edit the image!</p>
<h2>Optimizing the SVG</h2>
<p>Before deploying an svg on a production website, the svg should be optimized, i.e. made as small as possible.</p>
<p><strong>WARNING: Optimization can lead to information loss and therefore should not be part of an automated build process</strong>.</p>
<h3>Manual Editing Width and Height</h3>
<p>Illustrator will output an image width and height that matches the viewBox dimensions. This is probably not what you want! The viewBox dimensions are large to (hopefully) avoid floating point numbers. The <code>width</code> and <code>height</code> attributes are the default pixel dimensions of the image. The web page will use those dimensions as a fallback if CSS is not loaded. For an icon, those numbers should probably be something like 24 or 48, not 960!</p>
<p>Edit the image file in the text editor of your choice and change the width and height values. This can be done either before or after any other image optimizations.</p>
<pre><code class="hljs">&lt;svg <span class="hljs-attribute">id</span>=<span class="hljs-string">&quot;a&quot;</span> <span class="hljs-attribute">xmlns</span>=<span class="hljs-string">&quot;http://www.w3.org/2000/svg&quot;</span> <span class="hljs-attribute">width</span>=<span class="hljs-string">&quot;24&quot;</span> <span class="hljs-attribute">height</span>=<span class="hljs-string">&quot;24&quot;</span> <span class="hljs-attribute">viewBox</span>=<span class="hljs-string">&quot;0 0 960 960&quot;</span>&gt;
</code></pre>
<h3>Using svgo</h3>
<p>The Node.js application <code>svgo</code> application can be used to help optimize SVGs (i.e. make them as small as possible).</p>
<p>Out-of-the-box, svgo removes the viewBox attribute, which destroys the ability to resize SVGs with CSS! With the following config file and command, viewBox is maintained and the numerical precision of the paths is set to 0 (integers).</p>
<p><a href="/img/svg_illustrator/svgo.config.js" download="">svgo.config.js (Download)</a></p>
<pre><code class="hljs">$ npm install -g svgo
$ svgo <span class="hljs-attr">--config</span> svgo<span class="hljs-selector-class">.config</span><span class="hljs-selector-class">.js</span> -o output<span class="hljs-selector-class">.svg</span> <span class="hljs-attr">--input</span> <span class="hljs-selector-tag">input</span><span class="hljs-selector-class">.svg</span>
</code></pre>
<p>When using the tool, take care to make sure the optimization hasn’t adversely affected the image. For example, the default precision of the tool is 3 decimal places (the recommended Illustrator output is two decimal places). Adding <code>-p3</code> to the command will revert back to the default precision.</p>
<h3>Linting with svglint</h3>
<p>A linter is a tool that validates the correctness of a code file. The <code>svglint</code> application helps ensure that your SVG files adhere to standards and best practices.</p>
<pre><code class="hljs">$ npm install -g https:<span class="hljs-regexp">//gi</span>thub.com<span class="hljs-regexp">/kcaran/</span>svglint.git
</code></pre>
<p>The <code>svglint</code> application uses .svglintrc.js as its default configuration file. With this version, you can place the configuration file in your home directory and use it globally:</p>
<p><a href="/img/svg_illustrator/.svglintrc.js" download="">.svglintrc.js (Download)</a></p>
<pre><code class="hljs">$ svglint safety_icon.svg
<span class="hljs-comment">------------------------------------ Files ------------------------------------</span>
x safety_icon.svg
  x <span class="hljs-meta">&lt;?</span>xml <span class="hljs-built_in">start</span> tag unnecessary Starting xml tag unnecessary

<span class="hljs-comment">----------------------------------- Summary -----------------------------------</span>
x <span class="hljs-number">1</span> invalid <span class="hljs-built_in">files</span>.
</code></pre>
<h2>Resources</h2>
<h3><a href="https://www.aaron-gustafson.com/notebook/please-size-your-inline-svgs/">https://www.aaron-gustafson.com/notebook/please-size-your-inline-svgs/</a></h3>
<h3><a href="https://www.sarasoueidan.com/blog/svg-coordinate-systems/">https://www.sarasoueidan.com/blog/svg-coordinate-systems/</a></h3>
<h3><a href="https://stackoverflow.com/questions/18467982/are-svg-parameters-such-as-xmlns-and-version-needed">https://stackoverflow.com/questions/18467982/are-svg-parameters-such-as-xmlns-and-version-needed</a></h3>
<h3><a href="https://css-irl.info/optimising-svgs-for-the-web/">https://css-irl.info/optimising-svgs-for-the-web/</a></h3>
<h3><a href="https://cloudconvert.com/svg-to-emf">https://cloudconvert.com/svg-to-emf</a></h3>

    ]]>
      </content>
    </entry>
  
    
    <entry>
      <title>Regex is a Programming Superpower!</title>
      <link href="https://www.kcaran.com/posts/regex-is-a-programming-superpower.html"/>
      <published>2023-08-21T00:00:00Z</published>
      <updated>2023-08-21T00:00:00Z</updated>
      <id>https://www.kcaran.com/posts/regex-is-a-programming-superpower.html</id>
      <content type="html">
        <![CDATA[
      <p>In an August 15 tweet, <a href="https://twitter.com/iamdevloper/status/1691353496673513472?s=20">@iamdevloper</a>, a very funny programmer-humor account, asked which technology you wouldn’t bother to learn over again: JavaScript, Regex, Kubernetes, or PHP. Never mind the completely obvious answer (if you aren’t in operations at Google, you probably don’t need Kubernetes), I was blown away on how many of the responders admitting to not knowing Regex.</p>
<h2>A Brief Origin Story</h2>
<p>Back in the 90’s when the World Wide Web was just getting started and you could <a href="https://www.amazon.com/Teach-Yourself-Publishing-Html-Week/dp/0672306670">teach yourself to publish for the web in a week</a>, building HTML forms and processing them with CGI was my first real foray into text processing. I wrote some CGI-processing scripts in C, but it was hard! It was tedious!</p>
<p>About the same time a college intern I worked with introduced me to Perl. I couldn’t believe how easy it made everything. I could read in text files, process the lines, and output the results? Without allocating any memory or guessing how big the file was? I could work directly on entire strings, lines, or even files instead of processing them character by character? It was magic!</p>
<p>Regular expressions were (and still are) a fundamental part of Perl. The <a href="https://www.amazon.com/Learning-Perl-Making-Things-Possible-dp-1492094951/dp/1492094951/">Learning Perl book</a>, which is still an incredible resource, devotes three entire chapters to them:</p>
<blockquote>
<p>Regular expressions are actually tiny programs in their own special language, built inside Perl.</p>
</blockquote>
<p>Regular expressions are an integral part of Perl. Other languages seem to bolt on the functionality almost as an afterthought. My suspicion is that is why some programmers haven’t learned to use them.</p>
<h2>My Own Regular Expression Usage</h2>
<p>Using ack I took a quick look at my <a href="https://www.adventofcode.com">Advent of Code</a> solutions over the years to see how many of my programs contained regular expressions:</p>
<pre><code class="hljs">kacmbp23:~$ <span class="hljs-built_in">ls</span> -1 adventofcode20*/*.pl | <span class="hljs-built_in">wc</span> -l
     266
kacmbp23:~$ ack -l \[\!\=\]\~ adventofcode*/*.pl | <span class="hljs-built_in">wc</span> -l
     148
</code></pre>
<p>148/266 = 55.6% of my Advent of Code programs had at least one regular expression. I was actually a little surprised it was that <em>low</em>.</p>
<p>Running over a sample of perl scripts at work (which are mostly web applications), regular expression usage is even higher:</p>
<pre><code class="hljs">ramone8:<span class="hljs-regexp">/var/</span>www<span class="hljs-regexp">/apps$ ls -1 */</span>*.pl | wc -l
<span class="hljs-number">566</span>
ramone8:<span class="hljs-regexp">/var/</span>www<span class="hljs-regexp">/apps$ ack -l \[\!\=\]\~ */</span>*.pl | wc -l
<span class="hljs-number">445</span>
</code></pre>
<p>445/566 = 78.6% of our web application programs have at least one regular expression. That’s more like it!</p>
<h2>Conclusion and Recommendation</h2>
<p>If you aren’t using regular expressions, um, regularly, in your code, you may be doing yourself a disservice! Take it from <em>Learning Perl</em>, they aren’t all that terribly difficult to learn. You don’t have to use all the features immediately. Some of the more advanced ones, like <code>/(negative\s)?look(ahead|behind)/</code> can come later.</p>
<h2>Resources</h2>
<h3>Learn regex the easy way</h3>
<p><a href="https://github.com/ziishaned/learn-regex">https://github.com/ziishaned/learn-regex</a></p>
<p>A very nice, short summary of the basics of regular expressions</p>
<h3><em>Learning Perl</em> and <em>Mastering Regular Expressions</em></h3>
<p><a href="https://www.amazon.com/Learning-Perl-Making-Things-Possible-dp-1492094951/dp/1492094951/">Learning Perl book</a></p>
<p><a href="https://www.amazon.com/Mastering-Regular-Expressions-Jeffrey-Friedl/dp/0596528124/">Mastering Regular Expressions</a> is supposed to be the absolute Tome of Enlightenment on the subject, but I wouldn’t know because I felt like I had enough background from Perl. It is probably a blind spot for me.</p>
<h3>Mastering Lookahead and Lookbehind</h3>
<p><a href="https://www.regular-expressions.info/lookaround.html">https://www.regular-expressions.info/lookaround.html</a></p>
<p>I’ll admit that lookahead/lookbehind has always been troublesome for me and in the past I would go out of my way to avoid them. But this is my reference for when I do use them.</p>
<p>This one is also good:</p>
<p><a href="https://www.rexegg.com/regex-lookarounds.html">https://www.rexegg.com/regex-lookarounds.html</a></p>
<h3>Using regular expressions in JavaScript</h3>
<p><a href="https://developer.mozilla.org/en-US/docs/Web/JavaScript/Guide/Regular_Expressions">https://developer.mozilla.org/en-US/docs/Web/JavaScript/Guide/Regular_Expressions</a></p>
<p>JavaScript seems to have a more dysfunctional relationship with regular expressions than any other language. It’s been largely corrected over the years, but I still wind up having to look up syntax and waste brain cycles over how to properly craft an expression in JS.</p>

    ]]>
      </content>
    </entry>
  
    
    <entry>
      <title>Using ack to search Apache web logs</title>
      <link href="https://www.kcaran.com/posts/using-ack-to-search-apache-web-logs.html"/>
      <published>2021-01-12T00:00:00Z</published>
      <updated>2021-01-12T00:00:00Z</updated>
      <id>https://www.kcaran.com/posts/using-ack-to-search-apache-web-logs.html</id>
      <content type="html">
        <![CDATA[
      <p>The <code>ack</code> utility uses Perl regular expressions to efficiently search
source code, with smart defaults to limit the results to what you
expect.</p>
<p>One of the ways I use it is to search our Apache web log files. The
logs capture all requests, including ones for images, style sheets,
fonts, and javascript files. But usually I’m only interested in who
visited which web pages, including CGI scripts.</p>
<p>I’ve added a Bash function to my <code>.bashrc</code> file, <code>acklog</code>, that filters
out the extraneous files automatically:</p>
<pre><code class="hljs language-bash"><span class="hljs-comment"># ack (grep) for scripts in apache</span>
<span class="hljs-keyword">function</span> <span class="hljs-function"><span class="hljs-title">acklog</span></span>() {
  ack <span class="hljs-string">&quot;<span class="hljs-variable">$@</span>&quot;</span> | ack -v <span class="hljs-string">&#x27;\.(css|eot|gif|ico|jpe?g|js|png|svg|swf|webp|woff2?|xml)[? ]&#x27;</span>
}
</code></pre>

    ]]>
      </content>
    </entry>
  
    
    <entry>
      <title>Automatically Updating CVS Revisions Remotely</title>
      <link href="https://www.kcaran.com/posts/automatically-updating-cvs-revisions-remotely.html"/>
      <published>2017-08-21T00:00:00Z</published>
      <updated>2017-08-21T00:00:00Z</updated>
      <id>https://www.kcaran.com/posts/automatically-updating-cvs-revisions-remotely.html</id>
      <content type="html">
        <![CDATA[
      <p>Our install process involves updating the CVS versions of individual files
on the staging and ultimately production servers. Web Operations is
responsible for manually updating the files listed on an electronic
install form.</p>
<p>After over ten years of this process, I finally realized that we could
automate this process, at least for the staging server. A cron script
polling a system mailbox every two minutes kicks off the process.</p>
<h2>CVS Command</h2>
<p>Because the cron job runs under the Apache web server user, we need to
set the correct CVSROOT before every CVS command.</p>
<pre><code class="hljs language-perl"><span class="hljs-keyword">my</span> $CVS_CMD = <span class="hljs-string">&quot;export CVS_RSH=ssh; cvs -d :ext:$ENV{ USER }\@cvs_server:/home/cvs&quot;</span>;
</code></pre>
<p>It’s more challenging than you would think to get both the latest (head)
version on the main branch as well as the currently installed version.
To get the head use cvs log and to get the current version cvs status.</p>
<pre><code class="hljs language-perl"><span class="hljs-keyword">my</span> ($head) = <span class="hljs-string">`cd $file-&gt;{ directory }
	&amp;&amp; $CVS_CMD log $file-&gt;{ filename } | grep head`</span>
		=~ <span class="hljs-regexp">/head:\s+$CVS_VERSION/</span>;

<span class="hljs-keyword">my</span> ($current) = <span class="hljs-string">`cd $file-&gt;{ directory }
	&amp;&amp; $CVS_CMD status $file-&gt;{ filename } | grep Working`</span>
		=~ <span class="hljs-regexp">/:\s+$CVS_VERSION/</span>;
</code></pre>
<p>If the desired version was different than the current, the script would
use a cvs update command to get the right version. If the desired version
is the same as the head, the script adds the -A option to the command to
clear any sticky tags.</p>
<p>As shown by the CVSROOT used, the CVS repository is on a different server,
so I set up SSH keys for the Apache user on both machines.</p>
<p>The cron job worked well if just a little slow. I showed it to some coworkers,
and one broke it right away! His installed had about 50 files, and the
script would stop connecting with the CVS repository entirely after updating
10 or so files.</p>
<p>After playing with adding timeouts between commands, I realized that the
company firewall was mistaking my script for a DOS attack! Every file needed
multiple CVS commands to process, and each of these commands would open a
new, individual SSH connection to the CVS repository. Eventually, the
firewall would simply ignore requests SSH commands from the staging server
for a few minutes, and the script would fail.</p>
<p>The fix was to keep the SSH connection open using the ControlMaster feature.
That way, all of the CVS commands would use the same socket, and the
firewall saw them as a single request.</p>
<pre><code class="hljs language-bash">-bash-4.1$ <span class="hljs-built_in">cat</span> .ssh/config
Host cvs_server
        ControlPath ~/.ssh/%r@%h:%p
        ControlMaster auto
        ControlPersist 10m
</code></pre>

    ]]>
      </content>
    </entry>
  
    
    <entry>
      <title>Calculating Distances in Microsoft SQL Server</title>
      <link href="https://www.kcaran.com/posts/calculating-distances-in-microsoft-sql-server.html"/>
      <published>2017-02-14T00:00:00Z</published>
      <updated>2017-02-14T00:00:00Z</updated>
      <id>https://www.kcaran.com/posts/calculating-distances-in-microsoft-sql-server.html</id>
      <content type="html">
        <![CDATA[
      <p>One feature of almost every modern commercial website is the location finder. Enter in a search address, and site displays the closest locations to it with the distances (as the crow flies).</p>
<p>I ran into a couple of peculiar bugs trying to calculate distances in SQL. Floating point math is never easy, and these are the issues I faced using our Microsoft SQL Server database.</p>
<p>Using Google APIs, I was able to get the latitude and longitude for each of our agency locations and added them to the database table as <code>float</code>.
The formula for calculating the distance between two latitude/longitude pairs is the
<a href="http://www.movable-type.co.uk/scripts/latlong.html#cosine-law">Spherical Law of Cosines</a>.</p>
<p>After geolocating the search address (again using Google APIs), getting the closest locations and the distance in miles is relatively easy.</p>
<pre><code class="hljs language-perl"><span class="hljs-keyword">return</span> $mssql_dbh-&gt;exec_select( &lt;&lt;DISTANCE_SQL );
<span class="hljs-keyword">select</span> top <span class="hljs-number">10</span>
	rtrim(name01) as name01, rtrim(name02) as name02, rtrim(street) as street,
	rtrim(city) as city, <span class="hljs-keyword">state</span>, zip, rtrim(phone) as phone,
	rtrim(email) as email, rtrim(web) as web,
	latitude, longitude,
	acos(<span class="hljs-keyword">sin</span>(radians($lat)) * <span class="hljs-keyword">sin</span>(radians(latitude)) + <span class="hljs-keyword">cos</span>(radians($lat))
		* <span class="hljs-keyword">cos</span>(radians(latitude)) * <span class="hljs-keyword">cos</span>(radians(longitude) - radians($lon)))
		* <span class="hljs-number">3959</span>
		as distance
from agent_finder_info
	where (latitude &gt; <span class="hljs-number">40</span> <span class="hljs-keyword">and</span> longitude &lt; <span class="hljs-number">0</span>)
order by distance
DISTANCE_SQL
</code></pre>
<p>The where clause ignores any entries in the table that might not have a
latitude and longitude association with it.</p>
<p>This appeared to work fine in production for years. One day an agent called
and complained that the search for zip code 02185 (Braintree MA) wasn’t
working. The agents furthest east of that location (which
happened to be in Maine and on Cape Cod) were displayed - and reported as
being hundreds of miles away!</p>
<img src="/assets/img/location_02185.png" alt="Screenshot">
<p>The problem is for that area code, the longitude returned by Google is
<em>exactly 71 degrees North</em>. Perl treats this as an integer and the distance
formula looks like this:</p>
<pre><code class="hljs"><span class="hljs-function"><span class="hljs-title">acos</span>(<span class="hljs-title">sin</span>(<span class="hljs-title">radians</span>(<span class="hljs-number">42.22</span>)) * <span class="hljs-title">sin</span>(<span class="hljs-title">radians</span>(<span class="hljs-variable">latitude</span>)) + <span class="hljs-title">cos</span>(<span class="hljs-title">radians</span>(<span class="hljs-number">42.22</span>))</span>
	* <span class="hljs-function"><span class="hljs-title">cos</span>(<span class="hljs-title">radians</span>(<span class="hljs-variable">latitude</span>)) * <span class="hljs-title">cos</span>(<span class="hljs-title">radians</span>(<span class="hljs-variable">longitude</span>) - &lt;<span class="hljs-variable">b</span>&gt;<span class="hljs-title">radians</span>(<span class="hljs-number">71</span>)&lt;/<span class="hljs-variable">b</span>&gt;))</span>
	* <span class="hljs-number">3959</span>
</code></pre>
<p>In the SQL statement, <code>radians(71.0)</code> = -1.23918, but <code>radians(71)</code> = -1! Given an integer argument, radians returns an integer. Who the heck would want that??</p>
<p>My first fix was to explicitly cast the arguments to the radians() function as floats. Of course, I could have also done that in Perl.</p>
<pre><code class="hljs language-perl"><span class="hljs-keyword">return</span> $mssql_dbh-&gt;exec_select( &lt;&lt;DISTANCE_SQL );
<span class="hljs-keyword">select</span> top <span class="hljs-number">10</span>
	rtrim(name01) as name01, rtrim(name02) as name02, rtrim(street) as street,
	rtrim(city) as city, <span class="hljs-keyword">state</span>, zip, rtrim(phone) as phone,
	rtrim(email) as email, rtrim(web) as web,
	latitude, longitude,
	acos(<span class="hljs-keyword">sin</span>(radians(&lt;b&gt;cast($lat as float)&lt;<span class="hljs-regexp">/b&gt;)) * sin(radians(latitude))
		+ cos(radians(&lt;b&gt;cast($lat as float)&lt;/</span>b&gt;)) * <span class="hljs-keyword">cos</span>(radians(latitude))
		* <span class="hljs-keyword">cos</span>(radians(longitude) - radians(&lt;b&gt;cast($lon as float)&lt;/b&gt;)))
		* <span class="hljs-number">3959</span>
		as distance
from agent_finder_info
	where (latitude &gt; <span class="hljs-number">40</span> <span class="hljs-keyword">and</span> longitude &lt; <span class="hljs-number">0</span>)
order by distance
DISTANCE_SQL
</code></pre>
<p>This worked great.</p>

    ]]>
      </content>
    </entry>
  
    
    <entry>
      <title>Installing ODBC on Linux for MSSQL and AS400 DB2</title>
      <link href="https://www.kcaran.com/posts/installing-odbc-on-linux-for-mssql-and-as400-db2.html"/>
      <published>2013-03-01T00:00:00Z</published>
      <updated>2013-03-01T00:00:00Z</updated>
      <id>https://www.kcaran.com/posts/installing-odbc-on-linux-for-mssql-and-as400-db2.html</id>
      <content type="html">
        <![CDATA[
      <p>At work, we use Microsoft SQL Server and IBM AS400 databases.  Here’s
how I set our Linux boxes to allow them to connect to the databases
through ODBC.  There are seperate instructions for the
Debian and Ubuntu (9.10 Karmic Koala) and Red Hat Enterprise Linux
(RHEL4 and RHEL5) distributions.</p>
<p>ODBC connections require several layers of software to work.  The
bottom layer consists of the individual ODBC drivers for each
database system.  Our top layer is the DBI/DBD interface for Perl.
In between these layers is the ODBC driver manager, which keeps
track of the DSN’s and their corresponding ODBC drivers.</p>
<h2>Packages and Software to Install</h2>
<h4>Ubuntu Version (tested on 9.10 Karmic Koala)</h4>
<p>Debian Version (“unstable” distribution)</p>
<p>We use <strong>unixODBC</strong> as our ODBC driver manager.  First, install unixODBC:</p>
<p><strong>NOTE:  Perl’s DBD::ODBC module requires the developer’s version
of unixODBC, so install that one.</strong></p>
<pre><code class="hljs"># apt-<span class="hljs-built_in">get</span> install unixodbc-<span class="hljs-built_in">dev</span>
</code></pre>
<p>Finding an ODBC driver for SQL Server was a challenge, since
Microsoft refuses to directly support Linux.  Fortunately, freeTDS
(version 0.61 or later) seems to work fine.</p>
<pre><code class="hljs"><span class="hljs-comment"># apt-get install tdsodbc freetds-bin</span>
</code></pre>
<p><strong>Debian NOTE:</strong><br>
Originally, I installed the <strong>libsybdb3</strong> package to get freetds.
But somewhere along the road,
<strong>libsybdb3</strong> was replaced with <strong>libsybd5</strong>.
When I upgraded my Debian distribution, <strong>freetds</strong>
was uninstalled in the process!  Hopefully, the
<strong>tdsobdc</strong> package won’t suffer from name changes.</p>
<p>The ODBC driver to the AS400 comes directly from IBM.  The best part about
the IBM website is how they constantly change their links and don’t forward
the old ones.  They’re worse than Microsoft in that regard:</p>
<p><a href="http://www-03.ibm.com/systems/i/software/access/linux/downloads.html">http://www-03.ibm.com/systems/i/software/access/linux/downloads.html</a></p>
<pre><code class="hljs"><span class="hljs-meta prompt_"># </span><span class="language-bash">apt-get install rpm</span>
<span class="hljs-meta prompt_"># </span><span class="language-bash">apt-get install alien</span>
<span class="hljs-meta prompt_"># </span><span class="language-bash">alien -i iSeriesAccess-6.1.0-1.0.x86_64.rpm</span>
<span class="hljs-meta prompt_"># </span><span class="language-bash"><span class="hljs-built_in">ln</span> -s /opt/ibm/iSeriesAccess/lib64/libcwb* /usr/lib64</span>
</code></pre>
<h3>Red Hat Enterprise Linux Version</h3>
<p>We are using <strong>unixODBC</strong> as our ODBC driver manager.  A version of
unixODBC comes with the Red Hat installation,
but we need the developer’s version in order for both Perl’s
<strong>DBD::ODBC</strong> module and FreeTDS to work:</p>
<pre><code class="hljs">yum <span class="hljs-keyword">install</span> unixODBC-devel
</code></pre>
<p>Finding an ODBC driver for SQL Server was a challenge, since
Microsoft refuses to directly support Linux.  Fortunately, freeTDS
version 0.61 or greater seems to work fine.  Under Red Hat, we needed
to compile the application.</p>
<ol>
<li>
<p>Download the source code from <a href="http://www.freetds.org/">http://www.freetds.org/</a></p>
</li>
<li>
<p>Uncompress the gzipped tar file:</p>
<pre><code class="hljs"><span class="hljs-meta prompt_"># </span><span class="language-bash">gzip -<span class="hljs-built_in">cd</span> freetds-0.82.tgz | tar xf -</span>
</code></pre>
</li>
<li>
<p>Enter the freetds directory and configure, make, and install:</p>
<pre><code class="hljs"><span class="hljs-meta prompt_"># </span><span class="language-bash"><span class="hljs-built_in">cd</span> freetds-0.82</span>
<span class="hljs-meta prompt_"># </span><span class="language-bash"><span class="hljs-built_in">ln</span> -s /usr/lib/libodbcinst.so.1.0.0 /usr/lib/libodbcinst.so</span>
<span class="hljs-meta prompt_"># </span><span class="language-bash">configure --with-tdsver=7.0 --with-unixodbc=/usr/</span>
<span class="hljs-meta prompt_"># </span><span class="language-bash">make</span>
<span class="hljs-meta prompt_"># </span><span class="language-bash">make install</span>
</code></pre>
</li>
</ol>
<p>The ODBC driver to the AS400 comes directly from IBM:</p>
<p><a href="http://www-03.ibm.com/systems/i/software/access/linux/index.html">http://www-03.ibm.com/systems/i/software/access/linux/index.html</a></p>
<p>Of course, I had dependency issues.  The libstdc++ dependencies are
relevant, but the libXm and libXp libraries aren’t needed for ODBC
connections.</p>
<pre><code class="hljs"><span class="hljs-comment"># rpm -Uvh iSeriesAccess-5.4.0-1.6.i386.rpm</span>
<span class="hljs-attribute">error</span>: Failed dependencies:
        <span class="hljs-attribute">libstdc</span>++.so.<span class="hljs-number">5</span> is needed by iSeriesAccess-<span class="hljs-number">5</span>.<span class="hljs-number">4</span>.<span class="hljs-number">0</span>-<span class="hljs-number">1</span>.<span class="hljs-number">6</span>.i386
        <span class="hljs-attribute">libstdc</span>++.so.<span class="hljs-number">5</span>(CXXABI_1.<span class="hljs-number">2</span>) is needed by iSeriesAccess-<span class="hljs-number">5</span>.<span class="hljs-number">4</span>.<span class="hljs-number">0</span>-<span class="hljs-number">1</span>.<span class="hljs-number">6</span>.i386
        <span class="hljs-attribute">libstdc</span>++.so.<span class="hljs-number">5</span>(GLIBCPP_3.<span class="hljs-number">2</span>) is needed by iSeriesAccess-<span class="hljs-number">5</span>.<span class="hljs-number">4</span>.<span class="hljs-number">0</span>-<span class="hljs-number">1</span>.<span class="hljs-number">6</span>.i386
        <span class="hljs-attribute">libstdc</span>++.so.<span class="hljs-number">5</span>(GLIBCPP_3.<span class="hljs-number">2</span>.<span class="hljs-number">2</span>) is needed by iSeriesAccess-<span class="hljs-number">5</span>.<span class="hljs-number">4</span>.<span class="hljs-number">0</span>-<span class="hljs-number">1</span>.<span class="hljs-number">6</span>.i386
        <span class="hljs-attribute">libXm</span>.so.<span class="hljs-number">3</span> is needed by iSeriesAccess-<span class="hljs-number">5</span>.<span class="hljs-number">4</span>.<span class="hljs-number">0</span>-<span class="hljs-number">1</span>.<span class="hljs-number">6</span>.i386
        <span class="hljs-attribute">libXp</span>.so.<span class="hljs-number">6</span> is needed by iSeriesAccess-<span class="hljs-number">5</span>.<span class="hljs-number">4</span>.<span class="hljs-number">0</span>-<span class="hljs-number">1</span>.<span class="hljs-number">6</span>.i386

<span class="hljs-comment"># yum install /usr/lib/libstdc++.so.5</span>

<span class="hljs-comment"># rpm -Uvh --nodeps iSeriesAccess-5.4.0-1.6.i386.rpm</span>
</code></pre>
<h2>Configuration</h2>
<ol>
<li>
<p>Add SQL Server hosts to the FreeTDS configuration file:</p>
<p><code>/etc/freetds/freetds.conf</code> (Ubuntu/Debian)</p>
<p><code>/usr/local/etc/freetds.conf</code> (Red hat)</p>
<pre><code class="hljs">[TDSproduction]
    host <span class="hljs-operator">=</span> <span class="hljs-number">10.28</span>.<span class="hljs-number">78.52</span>
    port <span class="hljs-operator">=</span> <span class="hljs-number">1433</span>
    tds version <span class="hljs-operator">=</span> <span class="hljs-number">7.0</span>
</code></pre>
</li>
<li>
<p>Confirm the new drivers are in the driver config file:
<code>/etc/odbcinst.ini</code> (Ubuntu/Debian and Red Hat)</p>
<pre><code class="hljs"><span class="hljs-section">[FreeTDS]</span>
<span class="hljs-attr">Description</span>     = MS SQL driver
<span class="hljs-attr">Driver</span>          = /usr/local/lib/libtdsodbc.so
<span class="hljs-attr">FileUsage</span>       = <span class="hljs-number">2</span>

<span class="hljs-section">[ODBC]</span>
<span class="hljs-attr">Trace</span>           = <span class="hljs-literal">No</span>       <span class="hljs-comment">;(=Yes if tracing using unixODBC)</span>

<span class="hljs-section">[iSeries Access ODBC Driver]</span>
<span class="hljs-attr">Description</span>     = iSeries Access for Linux ODBC Driver
<span class="hljs-attr">Driver</span>          = /opt/ibm/iSeriesODBC/lib/libcwbodbc.so
<span class="hljs-attr">Setup</span>           = /opt/ibm/iSeriesODBC/lib/libcwbodbc.so
<span class="hljs-attr">Threading</span>       = <span class="hljs-number">2</span>
<span class="hljs-attr">FileUsage</span>       = <span class="hljs-number">1</span>
</code></pre>
</li>
<li>
<p>Add servers to the server file:
<code>/etc/odbc.ini</code> (Ubuntu/Debian and Red Hat)
<code>/usr/local/etc/odbc.ini</code> (Red Hat)</p>
<pre><code class="hljs"><span class="hljs-section">[Production]</span>
<span class="hljs-attr">Driver</span>                  = FreeTDS
<span class="hljs-attr">Description</span>             = Production MS SQL Database
<span class="hljs-attr">Servername</span>              = TDSproduction
<span class="hljs-attr">Database</span>                = AVC
<span class="hljs-attr">UID</span>                     = content1_badsg-<span class="hljs-number">1</span>

<span class="hljs-section">[AS400]</span>
<span class="hljs-attr">Driver</span>                  = iSeries Access ODBC Driver
<span class="hljs-attr">Description</span>             = Production AS/<span class="hljs-number">400</span> Database
<span class="hljs-attr">Servername</span>              = AS400.APPN.SNA.IBM.COM
<span class="hljs-attr">System</span>                  = AS400.APPN.SNA.IBM.COM
<span class="hljs-attr">DefaultLibraries</span>        = TESTMS
<span class="hljs-attr">UID</span>                     = webodbc
</code></pre>
</li>
</ol>
<h2>Test the Connections</h2>
<ol>
<li>
<p>Verify unixODBC setup using odbcinst:</p>
<pre><code class="hljs"><span class="hljs-meta"># odbcinst -q -d</span>
	[<span class="hljs-meta">FreeTDS</span>]
	[<span class="hljs-meta">iSeries Access ODBC Driver</span>]

<span class="hljs-meta"># odbcinst -q -s</span>
	[<span class="hljs-meta">Production</span>]
	[<span class="hljs-meta">AS400</span>]
</code></pre>
</li>
<li>
<p>Test connection to FreeTDS servers using tsql.<br>
<strong>Note:</strong> make sure you use the server name, not the ODBC DSN, for the
<code>-S</code> argument.  See <code>man tsql</code> for more details.</p>
<pre><code class="hljs"><span class="hljs-meta"># tsql -STDSproduction -Usa</span>
</code></pre>
</li>
<li>
<p>Test connections through unixODBC:</p>
<pre><code class="hljs"><span class="hljs-meta"># isql AS400 username PASSWORD</span>
</code></pre>
</li>
<li>
<p>Debugging tools for connecting to AS400:</p>
<pre><code class="hljs"># <span class="hljs-regexp">/opt/i</span>bm<span class="hljs-regexp">/iSeriesODBC/</span>bin/cwbping as400.appn.sna.ibm.com
</code></pre>
</li>
</ol>
<h2>Installing DBD::ODBC module for Perl</h2>
<pre><code class="hljs"><span class="hljs-meta prompt_"># </span><span class="language-bash"><span class="hljs-built_in">cd</span></span>
<span class="hljs-meta prompt_"># </span><span class="language-bash">perl -MCPAN -eshell</span>
<span class="hljs-meta prompt_"># </span><span class="language-bash">get DBD::ODBC</span>
&lt;&gt;quit
<span class="hljs-meta prompt_"># </span><span class="language-bash">tcsh</span>
<span class="hljs-meta prompt_"># </span><span class="language-bash"><span class="hljs-built_in">cd</span> .cpan/build/DBD-ODBC-1.09</span>
<span class="hljs-meta prompt_"># </span><span class="language-bash">setenv DBI_DSN dbi:ODBC:LocalServer</span>
<span class="hljs-meta prompt_"># </span><span class="language-bash">setenv DBI_USER sa</span>
<span class="hljs-meta prompt_"># </span><span class="language-bash">setenv DBI_PASS sa</span>
<span class="hljs-meta prompt_"># </span><span class="language-bash">setenv ODBCHOME /usr</span>
<span class="hljs-meta prompt_"># </span><span class="language-bash">setenv LANG en_US</span>
<span class="hljs-meta prompt_"># </span><span class="language-bash">perl Makefile.PL</span>
<span class="hljs-meta prompt_"># </span><span class="language-bash">make</span>
<span class="hljs-meta prompt_"># </span><span class="language-bash">make <span class="hljs-built_in">test</span></span>
<span class="hljs-meta prompt_"># </span><span class="language-bash">make install</span>
</code></pre>

    ]]>
      </content>
    </entry>
  
    
    <entry>
      <title>Returing null Columns from iSeries AS400 with Perl DBI</title>
      <link href="https://www.kcaran.com/posts/returing-null-columns-from-iseries-as400-with-perl-dbi.html"/>
      <published>2012-08-08T00:00:00Z</published>
      <updated>2012-08-08T00:00:00Z</updated>
      <id>https://www.kcaran.com/posts/returing-null-columns-from-iseries-as400-with-perl-dbi.html</id>
      <content type="html">
        <![CDATA[
      <p>We’re having an issue with database queries to the iSeries AS400 through
Perl using DBI and DBD::ODBC. The issue occurs when the SQL statement
contains an outer join and the query returns rows with NULL columns:</p>
<pre><code class="hljs language-perl"><span class="hljs-keyword">my</span> $sql_query = <span class="hljs-string">qq|select PRSK01, PSTA15
                    from TESTHA.POLMAST
                    left join TESTHA.P15POLDP
                    on POLC01 = PPOL15 where POLC01 = 003950136|</span>;

<span class="hljs-comment"># Execute the sql query</span>
<span class="hljs-keyword">my</span> $sth = $dbh-&gt;prepare( $sql_query )
                    <span class="hljs-keyword">or</span> <span class="hljs-keyword">die</span> $sql_query, <span class="hljs-string">&quot;&lt;BR&gt;\n&quot;</span>, $DBI::errstr;

<span class="hljs-keyword">my</span> $data = $dbh-&gt;selectall_arrayref( $sth, {<span class="hljs-string">Columns=&gt;</span>{}}, @sql_data )
                    <span class="hljs-keyword">or</span> <span class="hljs-keyword">die</span> $sql_query, <span class="hljs-string">&quot;&lt;BR&gt;\n&quot;</span>, $sth-&gt;errstr;
</code></pre>
<p>The error returned is:</p>
<pre><code class="hljs">DBD::ODBC::db selectall_arrayref failed: st_fetch/SQLFetch (long truncated
DBI attribute LongTruncOk<span class="hljs-built_in"> not </span>set<span class="hljs-built_in"> and/or </span>LongReadLen too small) (SQL-HY000)
</code></pre>
<p>The error message lead me to believe that we could fix it by setting
<code>$dbh-&gt;{ LongTruncOK } = 1</code> before making the query. But this
actually gave us
some serious side effects. Instead of a null or an empty string, DB
returned two (or more) ‘\0’ characters. Here is an example from Data::Dumper.
The ‘^@’ characters are zero byte (Hex 00) characters.</p>
<pre><code class="hljs language-perl">$VAR1 = [
           {
             <span class="hljs-string">&#x27;ADJNAM&#x27;</span> =&gt;  <span class="hljs-string">&#x27;A. Jonathan - Arb&#x27;</span>,
             <span class="hljs-string">&#x27;CNPD75&#x27;</span> =&gt;  <span class="hljs-string">&#x27;^@^@&#x27;</span>,
             <span class="hljs-string">&#x27;CADN75&#x27;</span> =&gt;  <span class="hljs-string">&#x27;^@^@^@^@^@^@^@^@^@^@^@^@^@^@&#x27;</span>,
             <span class="hljs-string">&#x27;CIDO75&#x27;</span> =&gt;  <span class="hljs-string">&#x27;^@^@&#x27;</span>,
             <span class="hljs-string">&#x27;CADC75&#x27;</span> =&gt;  <span class="hljs-string">&#x27;^@^@^@&#x27;</span>,
             <span class="hljs-string">&#x27;ADJCOD&#x27;</span> =&gt;  <span class="hljs-string">&#x27;U2&#x27;</span>
           },
</code></pre>
<p>Fortunately, there is a better work-around. In the SQL, return an empty string
if the column is null, otherwise return the column:</p>
<pre><code class="hljs language-perl"><span class="hljs-keyword">my</span> $sql_query = <span class="hljs-string">qq|select PRSK01,
                    case when PSTA15 is null then &#x27;&#x27; else PSTA15 end as PSTA15
                    from TESTHA.POLMAST
                    left join TESTHA.P15POLDP
                    on POLC01 = PPOL15 where POLC01 = 003950136|</span>;
</code></pre>
<p>Note that this occurs both on RHEL6 and Linux Mint 12, on both perl v5.10.1
and v 5.12.4, with DBI version 1.622 and DBD::ODBC version 1.39.
It does not happen using the command line isql program to run the query.</p>

    ]]>
      </content>
    </entry>
  
    
    <entry>
      <title>Using jQuery Tablesorter With Dynamic Tables</title>
      <link href="https://www.kcaran.com/posts/using-jquery-tablesorter-with-dynamic-tables.html"/>
      <published>2012-06-21T00:00:00Z</published>
      <updated>2012-06-21T00:00:00Z</updated>
      <id>https://www.kcaran.com/posts/using-jquery-tablesorter-with-dynamic-tables.html</id>
      <content type="html">
        <![CDATA[
      <p>Here are a couple of tricks to remember when using jQuery’s tablesorter plugin with dynamic tables. These are tables that the user can add or delete from.</p>
<ol>
<li>
<p>If the table begins empty (with no rows in <code>&lt;tbody&gt;</code>), you can’t
specify a default sort.</p>
<p>If there are no rows in the <code>&lt;tbody&gt;</code> section when the page is first
loaded, the sortList command will crash with a “parsers is undefined”
error.</p>
</li>
<li>
<p>When the table is modified (rows are added or deleted), let tablesorter
know the table has been changed with the following command:</p>
<pre><code class="hljs language-javascript">$( <span class="hljs-string">&#x27;table.tablesorter&#x27;</span> ).<span class="hljs-title function_">trigger</span>( <span class="hljs-string">&#x27;update&#x27;</span> );
</code></pre>
</li>
<li>
<p>Sorting checkboxes - you need to add a customized parser for sorting
checkboxes (and other form input fields):</p>
<pre><code class="hljs language-javascript">$.tablesorter.<span class="hljs-title function_">addParser</span>({
    <span class="hljs-attr">id</span>: <span class="hljs-string">&#x27;checkbox&#x27;</span>,
    <span class="hljs-attr">is</span>: <span class="hljs-keyword">function</span>(<span class="hljs-params">s</span>) {
        <span class="hljs-comment">// return false so this parser is not auto-detected</span>
        <span class="hljs-keyword">return</span> <span class="hljs-literal">false</span>;
    },
    <span class="hljs-attr">format</span>: <span class="hljs-keyword">function</span>(<span class="hljs-params">s, table, cell</span>) {
        <span class="hljs-keyword">var</span> checked = $( cell ).<span class="hljs-title function_">children</span>( <span class="hljs-string">&#x27;:checkbox&#x27;</span> ).<span class="hljs-title function_">attr</span>( <span class="hljs-string">&#x27;checked&#x27;</span> );
        <span class="hljs-keyword">return</span> checked ? <span class="hljs-number">1</span> : <span class="hljs-number">0</span>;
    },
    <span class="hljs-attr">type</span>: <span class="hljs-string">&#x27;numeric&#x27;</span>
});

$( <span class="hljs-string">&#x27;table.tablesorter&#x27;</span> ).<span class="hljs-title function_">tablesorter</span>({
    <span class="hljs-attr">headers</span>: {
        <span class="hljs-number">2</span>: { <span class="hljs-attr">sorter</span>: <span class="hljs-string">&#x27;checkbox&#x27;</span> }
    }
});
</code></pre>
<p><em>The update trigger needs to be set when form fields are changed as well.</em></p>
</li>
<li>
<p>When using the zebra widget, you need to specify an ‘odd’ class for your
table rows:</p>
<pre><code class="hljs language-scss"><span class="hljs-selector-tag">body</span><span class="hljs-selector-id">#employee-access</span> <span class="hljs-selector-tag">tr</span> {
	<span class="hljs-attribute">background-color</span>:<span class="hljs-number">#f1f0eb</span>;
}

<span class="hljs-selector-tag">body</span><span class="hljs-selector-id">#employee-access</span> <span class="hljs-selector-tag">tr</span><span class="hljs-selector-class">.odd</span> {
	<span class="hljs-attribute">background-color</span>:<span class="hljs-number">#e3e2dd</span>;
}
</code></pre>
<p>If you update the table (for example, removing rows):</p>
<pre><code class="hljs language-javascript">$( <span class="hljs-string">&#x27;table.tablesorter&#x27;</span> ).<span class="hljs-title function_">trigger</span>( <span class="hljs-string">&#x27;applyWidgets&#x27;</span> );
</code></pre>
</li>
<li>
<p>Additional documentation:</p>
<p><a href="http://wowmotty.blogspot.com/2011/06/jquery-tablesorter-missing-docs.html">http://wowmotty.blogspot.com/2011/06/jquery-tablesorter-missing-docs.html</a></p>
<p><a href="http://mottie.github.com/tablesorter/docs/">http://mottie.github.com/tablesorter/docs/</a></p>
</li>
</ol>

    ]]>
      </content>
    </entry>
  
    
    <entry>
      <title>Notes from the Perl FAQ</title>
      <link href="https://www.kcaran.com/posts/notes-from-the-perl-faq.html"/>
      <published>2012-01-20T00:00:00Z</published>
      <updated>2012-01-20T00:00:00Z</updated>
      <id>https://www.kcaran.com/posts/notes-from-the-perl-faq.html</id>
      <content type="html">
        <![CDATA[
      <p>Like the fellow that never read his car’s owner’s manual, I had never read the
entire
<a href="https://perldoc.perl.org/index-faq.html">Perl FAQ</a>.
I finally did it over the holidays, and these are some notes that I took.</p>
<ul>
<li>
<p><a href="https://metacpan.org/pod/Time::Piece"><code>Time::Piece</code></a>
– CPAN module that provides object oriented time objects, It also provides date and time addition, subtraction and comparison and date parsing.</p>
<pre><code class="hljs language-perl"><span class="hljs-keyword">use</span> Time::Piece;

<span class="hljs-keyword">my</span> $t = <span class="hljs-keyword">localtime</span>;
<span class="hljs-keyword">print</span> <span class="hljs-string">&quot;Time is $t\n&quot;</span>;
<span class="hljs-keyword">print</span> <span class="hljs-string">&quot;Year is &quot;</span>, $t-&gt;year, <span class="hljs-string">&quot;\n&quot;</span>;
</code></pre>
</li>
<li>
<p><a href="https://metacpan.org/pod/Text::Autoformat"><code>Text::Autoformat</code></a>
– CPAN module that provides paragraph formatting and case transformations</p>
</li>
<li>
<p>A list has a fixed set of elements, but an array is variable. You can use arrays for list functions, but you can’t use lists with array functions (<code>push(), pop(), shift(), unshift()</code>). <a href="https://perldoc.perl.org/perlfaq4.html#What-is-the-difference-between-a-list-and-an-array%3f">&lt;<link>&gt;</a></p>
</li>
<li>
<p><code>@array[1]</code> - The sigil is <em>not</em> the variable type. This is actually a slice with a single element. <a href="https://perldoc.perl.org/perlfaq4.html#What-is-the-difference-between-%24array%5b1%5d-and-%40array%5b1%5d%3f">&lt;<link>&gt;</a></p>
</li>
<li>
<p><a href="https://metacpan.org/pod/List::Util"><code>List::Util</code></a> - <code>first()</code> - Similar to grep, but returns the first element where the result from the block is a true value.</p>
<p>Also includes <code>max()</code>, <code>min()</code>, <code>shuffle()</code>, <code>sum()</code>, and <code>reduce()</code>. The perldoc also includes a number of example subroutines (all, any, none, notall).</p>
</li>
<li>
<p><code>&quot;\L$a&quot;</code> - Returns the contents of $a, but all lowercase.</p>
</li>
<li>
<p><code>$| = 1</code> - perl filehandle select. Each filehandle has its own copy of this value, so you can’t set it globally.<br>
If you use IO::Handle, you can call the autoflush method to change the setting of the filehandle:</p>
<pre><code class="hljs language-perl"><span class="hljs-keyword">use</span> IO::Handle;
<span class="hljs-keyword">open</span> <span class="hljs-keyword">my</span>( $io_fh ), <span class="hljs-string">&quot;&gt;&quot;</span>, <span class="hljs-string">&quot;output.txt&quot;</span>;
$io_fh-&gt;autoflush(<span class="hljs-number">1</span>);
</code></pre>
<p><a href="https://perldoc.perl.org/perlfaq5.html#How-do-I-flush%2funbuffer-an-output-filehandle%3f-Why-must-I-do-this%3f">&lt;<link>&gt;</a></p>
</li>
<li>
<p><code>print &quot;@array&quot;</code> puts spaces between the elements, <code>print @array</code> does not.</p>
</li>
<li>
<p><code>/o</code>, which tells Perl to complie a regular expression only once, is obsolete as of 5.6.</p>
</li>
<li>
<p><code>use re 'debug';</code> to debug regular expressions</p>
</li>
<li>
<p><code>\G</code> in regular expressions - Used with the <code>/g</code> flag, this anchors the last
match. It uses the value of <code>pos()</code> as the position to start the next match. It is similar to the string anchor <code>^</code> and can be helpful in finding only consecutive matches. <a href="https://perldoc.perl.org/perlfaq6.html#What-good-is-%5cG-in-a-regular-expression%3f">&lt;<link>&gt;</a></p>
</li>
<li>
<p>The special variables <code>@-</code> and <code>@+</code> replace <code>$```, </code>$&amp;<code>, and </code>$'` <a href="https://perldoc.perl.org/perlfaq6.html#Why-does-using-%24%26%2c-%24%60%2c-or-%24'-slow-my-program-down%3f">&lt;<link>&gt;</a></p>
</li>
<li>
<p>Smart match (<code>~~</code>) in perl 5.10 - Compare against an array of regular expressions</p>
<pre><code class="hljs language-perl"><span class="hljs-keyword">my</span> @patterns = ( <span class="hljs-regexp">qr/Fr.d/</span>, <span class="hljs-regexp">qr/B.rn.y/</span>, <span class="hljs-regexp">qr/W.lm./</span> );
<span class="hljs-keyword">if</span>( $string ~~ @patterns ) {
	...
};
</code></pre>
</li>
<li>
<p>“A class is just a package, and its methods are just the package’s subroutines”</p>
<p>See <a href="https://perldoc.perl.org/perlboot.html">perlboot</a>,
<a href="https://perldoc.perl.org/perltoot.html">perltoot</a>,
<a href="https://perldoc.perl.org/perlbot.html">perlbot</a>,
and <a href="https://perldoc.perl.org/perlobj.html">perlobj</a></p>
</li>
<li>
<p>Although it has the same precedence as in C, Perl’s <code>?:</code> operator produces an
lvalue. This assigns $x to either $a or $b, depending on the trueness of
$maybe:</p>
<pre><code class="hljs language-perl">($maybe ? $a : $b) = $x
</code></pre>
</li>
<li>
<p>Don’t use the double-pipe or with unlink and other commands that are list operators, or put in extra parentheses: <a href="https://perldoc.perl.org/perlfaq7.html#Why-do-Perl-operators-have-different-precedence-than-C-operators%3f">&lt;<link>&gt;</a></p>
<pre><code class="hljs language-perl"><span class="hljs-keyword">unlink</span> $file || <span class="hljs-keyword">die</span>; <span class="hljs-comment"># This is wrong! You need to use &#x27;or&#x27; here</span>
(<span class="hljs-keyword">unlink</span> $file) || <span class="hljs-keyword">die</span>; <span class="hljs-comment"># This will work ok</span>
</code></pre>
</li>
<li>
<p>Use undef on the left side to skip return values in a list</p>
<pre><code class="hljs language-perl"><span class="hljs-keyword">my</span> ($name, $address, <span class="hljs-keyword">undef</span>, <span class="hljs-keyword">undef</span>, $zip) = get_address( $person );
</code></pre>
</li>
<li>
<p><code>redo</code> - restarts the loop block without evaluating the conditional again.</p>
</li>
<li>
<p>Creating a module - <a href="http://perldoc.perl.org/perlmod.html">perlmod</a>, <a href="http://perldoc.perl.org/perlmodlib.html">perlmodlib</a>, <a href="http://perldoc.perl.org/perlmodstyle.html">perlmodstyle</a> explain modules in all the gory details.</p>
<p><a href="http://perldoc.perl.org/perlnewmod.html">perlnewmod</a> gives a brief overview of the process along with a couple of suggestions about style.</p>
<p>If you don’t need to use C code, other tools such as
<a href="https://metacpan.org/pod/ExtUtils::ModuleMaker"><code>ExtUtils::ModuleMaker</code></a>
and
<a href="https://metacpan.org/pod/Module::Starter"><code>Module::Starter</code></a>
can help you create a skeleton module distribution.</p>
</li>
<li>
<p>Tom Christainsen’s article on why you almost always need a comparison
function when calling <code>sort</code>. Perl’s <code>cmp</code> function (and C’s <code>strcmp</code>)
is not an alphanumeric comparator – it is a code point comparator.</p>
  <a href="http://www.perl.com/pub/2011/08/whats-wrong-with-sort-and-how-to-fix-it.html">
</li>
</ul>
<p><a href="http://www.perl.com/pub/2011/08/whats-wrong-with-sort-and-how-to-fix-it.html">http://www.perl.com/pub/2011/08/whats-wrong-with-sort-and-how-to-fix-it.html</a></a></p>
<ul>
<li>Use
<a href="https://metacpan.org/pod/Unicode::Collate"><code>Unicode::Collate</code></a>
to correctly sort unicode.</li>
</ul>

    ]]>
      </content>
    </entry>
  
    
    <entry>
      <title>CVS update error: &#39;No such file or directoryectory&#39;</title>
      <link href="https://www.kcaran.com/posts/cvs-update-error-no-such-file-or-directoryectory.html"/>
      <published>2011-11-10T00:00:00Z</published>
      <updated>2011-11-10T00:00:00Z</updated>
      <id>https://www.kcaran.com/posts/cvs-update-error-no-such-file-or-directoryectory.html</id>
      <content type="html">
        <![CDATA[
      <p>When I execute a CVS update command at work, I often get the following error:</p>
<pre><code class="hljs">[caran@mater safetypublic]$ cvs -q update -AdP
: No such <span class="hljs-keyword">file</span> or directoryectory <span class="hljs-regexp">/home/</span>cvs<span class="hljs-regexp">/safetypublic/</span>rsvp
cvs update: skipping directory rsvp
</code></pre>
<p><strong>No such directoryectory?</strong>  What the heck is that??</p>
<p>Most of my colleagues don’t work directly on the Linux-based web servers.  They
use TortoiseCVS on their workstations using a shared drive.  For some reason,
it occasionally (but not always) will convert the files in the CVS directory
to DOS line endings.</p>
<p>The fix is simple.  Use the <code>dos2unix</code> command to reset the CVS files to
Unix line endings.  It’s the <code>repository</code> file that causes the error.</p>
<pre><code class="hljs">[caran<span class="hljs-variable">@mater</span> safetypublic]<span class="hljs-variable">$ </span>cd rsvp/
[caran<span class="hljs-variable">@mater</span> rsvp]<span class="hljs-variable">$ </span>dos2unix CVS/*
<span class="hljs-symbol">dos2unix:</span> converting file CVS/Entries to UNIX format ...
<span class="hljs-symbol">dos2unix:</span> converting file CVS/Repository to UNIX format ...
[caran<span class="hljs-variable">@mater</span> rsvp]<span class="hljs-variable">$ </span>cvs -q update -AdP
M index.html
M rsvp-thankyou.html
[caran<span class="hljs-variable">@mater</span> rsvp]<span class="hljs-variable">$ </span>
</code></pre>
<p><strong>NOTE:</strong> Interestingly, a colleague of mine gets a slightly different
error, but the cause and cure are both the same:</p>
<pre><code class="hljs">: <span class="hljs-keyword">No</span> such <span class="hljs-keyword">file</span> <span class="hljs-keyword">or</span> directoryctory
</code></pre>

    ]]>
      </content>
    </entry>
  
    
    <entry>
      <title>Calling a Perl CGI script from within another CGI script</title>
      <link href="https://www.kcaran.com/posts/calling-a-perl-cgi-script-from-within-another-cgi-script.html"/>
      <published>2010-11-19T00:00:00Z</published>
      <updated>2010-11-19T00:00:00Z</updated>
      <id>https://www.kcaran.com/posts/calling-a-perl-cgi-script-from-within-another-cgi-script.html</id>
      <content type="html">
        <![CDATA[
      <p>Awhile back we had an issue where a coworker wanted to use one of my
Perl CGI scripts inside of her scripts, using the backticks method
to have it spit its output to the webpage.  But for some reason, my
script refuse to recognize the arguments she was passing it.  The
weird thing was, if we ran her script from the command line, everything
worked fine.</p>
<p>The issue is in the way <a href="http://CGI.pm">CGI.pm</a> detects whether it is being called from a
web browser or from the command line.  It checks for the presence
of the <strong>REQUEST_METHOD</strong> environmental variable.  If it is present,
CGI knows to get its arguments from the web browser.</p>
<p>When the inner script it called either using <code>system()</code> or the
backticks method, it inherits the <strong>REQUEST_METHOD</strong> environmental
variable from the
calling program!  It therefore thinks it’s being called directly from
Apache instead of the command-line shell, and ignores the arguments.
The trick to get it working is to temporarily clear the <strong>REQUEST_METHOD</strong>
environmental variable:</p>
<pre><code class="hljs language-perl"><span class="hljs-keyword">my</span> $cmd = <span class="hljs-string">&quot;./gen_report.pl search_date=10/2009 pdf=1&quot;</span>;

<span class="hljs-comment">#</span>
<span class="hljs-comment"># Call gen_report.pl script to generate the report.  Since gen_report.pl is</span>
<span class="hljs-comment"># a CGI script that we are calling from the command line, we need to clear</span>
<span class="hljs-comment"># out the request method variable for CGI.pm</span>
<span class="hljs-comment">#</span>
<span class="hljs-keyword">my</span> $request_method = $ENV{ REQUEST_METHOD };
$ENV{ REQUEST_METHOD } = <span class="hljs-string">&#x27;&#x27;</span>;
<span class="hljs-keyword">my</span> $display = <span class="hljs-string">`$cmd`</span>;
$ENV{ REQUEST_METHOD } = $request_method;
</code></pre>

    ]]>
      </content>
    </entry>
  
    
    <entry>
      <title>Java Terminator: Cross-Platform Terminal Emulator</title>
      <link href="https://www.kcaran.com/posts/java-terminator-cross-platform-terminal-emulator.html"/>
      <published>2010-11-05T00:00:00Z</published>
      <updated>2010-11-05T00:00:00Z</updated>
      <id>https://www.kcaran.com/posts/java-terminator-cross-platform-terminal-emulator.html</id>
      <content type="html">
        <![CDATA[
      <p>For years, I’ve been searching for a suitable terminal emulator for
<a href="https://www.cygwin.com">Cygwin</a>, but nothing seemed as
polished or had enough features to pull me away from the boring
default.</p>
<p>I finally found the Holy Grail in a program I’ll call
<a href="https://github.com/software-jessies-org/jessies/wiki/Terminator">Java Terminator</a>.
The authors of this fine program just call it <i>Terminator</i>, but unfortunately a later Linux GNOME-based terminal emulator
<a href="https://launchpad.net/terminator">of the same name</a>
stole some of their thunder.</p>
<p>The best part of
<a href="https://github.com/software-jessies-org/jessies/wiki/Terminator">Java Terminator</a>
(and there are many excellent parts) is that, because it is written in Java, it runs on Cygwin, Linux, and MacOS.  I’m able to use it at home on my Windows XP box and at work on Ubuntu, with no issues.  Other terrific features are multiple tabs (liked tabbed web browsing, only with many terminals per window), unlimited scrollback, and automatic logging of everything.</p>
<p>As with any cross-platform program, there are a few configuration differences or issues to be aware of:</p>
<h3>Redhat (RHEL5.2) and Centos</h3>
<ul>
<li>
<p>Creating <code>~/.terminfo/t/terminator</code> or <code>/usr/share/terminfo/t/terminator</code> doesn’t have any effect on the shell,
<b>vim</b>, or <b>less</b> or <b>man</b> commands.  After
installing the terminfo, create a section for terminator in termcap.</p>
<pre><code class="hljs language-bash">$ sudo sh -c <span class="hljs-string">&quot;infocmp -C &gt;&gt; /etc/termcap&quot;</span>
</code></pre>
<p>To do this locally (when you don’t have root access), you need to
both create <code>~/.termcap</code> and set the TERMCAP environmental
variable.</p>
<pre><code class="hljs language-bash">$ infocmp -C &gt; ~/.termcap
$ <span class="hljs-built_in">export</span> TERMCAP=~/.termcap
</code></pre>
</li>
<li>
<p>I was never able to get color working with Redhat’s version of <b>vim</b>.  Instead, I downloaded vim and built it from source.  The built version uses ncurses instead of termcap, and it colors fine.</p>
</li>
</ul>
<h3>Debian (4.0) and Ubuntu</h3>
<ul>
<li>Create either <code>~/.terminfo/t/terminator</code> or <code>/usr/share/terminfo/t/terminator</code>.  These distributions don’t use termcap, so everything just works!</li>
</ul>
<h3>Cygwin</h3>
<ul>
<li>
<p>I first tried creating <code>/usr/share/terminfo/t/terminator</code>
(without a local <code>~/.terminfo</code>).  Vim worked fine, but the shell
gave me a <b>No entry for terminal type “terminator”</b> error.  The
<b>less</b> and <b>man</b> commands both gave <b>WARNING: terminal is not fully functional</b> messages.  Added a local <code>~/.terminfo</code>
didn’t help.</p>
</li>
<li>
<p>Adding a record to termcap solved the shell issue, but not
<b>less</b> or <b>man</b>.</p>
<pre><code class="hljs language-bash">$ infocmp -C &gt;&gt; /etc/termcap
</code></pre>
<p>The <b>infocmp</b> command is part of the <b>ncurses</b> package.</p>
<p>It turns out, when I installed Cygwin, I set the default to Unix line feeds.  But the <b>infocmp</b> command spits out DOS line feeds!<br>
So my termcap file had Unix line feeds except for the terminator section.  Apparently, the shell could still read the file, but the <b>less</b> and <b>man</b> commands could not.  The <b>dos2unix</b>
command solved the problem!</p>
<pre><code class="hljs language-bash">$ dos2unix /etc/termcap
</code></pre>
</li>
<li>
<p>After that initial set-up, I’ve had no problems with emulator at all.  The program has an active <a href="https://groups.google.com/group/terminator-users/">Google group and mailing list</a>.  The authors and enthusiasts there are more than helpful.</p>
</li>
</ul>

    ]]>
      </content>
    </entry>
  
    
    <entry>
      <title>Using LWP::Simple to retrieve binary data</title>
      <link href="https://www.kcaran.com/posts/using-lwp-simple-to-retrieve-binary-data.html"/>
      <published>2010-04-16T00:00:00Z</published>
      <updated>2010-04-16T00:00:00Z</updated>
      <id>https://www.kcaran.com/posts/using-lwp-simple-to-retrieve-binary-data.html</id>
      <content type="html">
        <![CDATA[
      <p>We have a Perl CGI script at work that acts as a proxy.  It grabs a
<a href="http://www.flatmtn.com/article/creating-pkcs12-certificates">pkcs12 digital certificate</a>
file from an internal server and delivers it to a
user through his or her web browser.  The pkcs12 file is in binary format.</p>
<p>Everything worked fine until we put the code on a new server.  Suddenly, the
files downloaded by the web users were corrupted.  We also began seeing the
following warning in the log files:</p>
<pre><code class="hljs language-perl">Wide character in <span class="hljs-keyword">print</span> at download.cgi line <span class="hljs-number">124</span>.
</code></pre>
<p>Here is the code…</p>
<pre><code class="hljs language-perl"><span class="hljs-keyword">use</span> LWP::Simple;

<span class="hljs-comment"># $cert_url is the URL for the internal server&#x27;s pkcs12 certificate file</span>
<span class="hljs-keyword">my</span> $cert_p12 = get $cert_url;
<span class="hljs-keyword">if</span> ($cert_p12) {
  <span class="hljs-comment"># Get file name from the url</span>
  $cert_url =~ <span class="hljs-regexp">/\/(\w+)\.p12$/</span>;
  <span class="hljs-keyword">my</span> $id = $1 || <span class="hljs-string">&#x27;certificate&#x27;</span>;

  <span class="hljs-keyword">print</span> <span class="hljs-string">&quot;Content-type: application/x-pkcs12;\n&quot;</span>;
  <span class="hljs-keyword">print</span> <span class="hljs-string">&quot;Content-Disposition: attachment; filename=\&quot;$id.pfx\&quot;\n\n&quot;</span>;
  <span class="hljs-keyword">print</span> $cert_p12;
</code></pre>
<p>It turns out that someone had installed the latest version of LWP directly from CPAN onto the new server.  All of our other servers were using the version that came with RHEL5 from Red Hat.  The Red Hat version is almost six years old!</p>
<p>The newer version of LWP::Simple sees the binary data inside of the pkcs12 file and tries (unsuccessfully) to discern its character encoding — except that it is binary data!</p>
<p><strong>The solution is not to use LWP::Simple for retrieving binary data files.  Use LWP::UserAgent instead.</strong></p>
<pre><code class="hljs language-perl"><span class="hljs-keyword">use</span> LWP::UserAgent;

<span class="hljs-comment"># $cert_url is the URL for the internal server&#x27;s pkcs12 certificate file</span>
<span class="hljs-keyword">my</span> $response = LWP::UserAgent-&gt;new-&gt;get( $cert_url );
<span class="hljs-keyword">my</span> $cert_p12 = $response-&gt;content;

<span class="hljs-keyword">if</span> ($cert_p12) {
  <span class="hljs-comment"># Get file name from the url</span>
  $cert_url =~ <span class="hljs-regexp">/\/(\w+)\.p12$/</span>;
  <span class="hljs-keyword">my</span> $id = $1 || <span class="hljs-string">&#x27;certificate&#x27;</span>;

  <span class="hljs-keyword">print</span> <span class="hljs-string">&quot;Content-type: application/x-pkcs12;\n&quot;</span>;
  <span class="hljs-keyword">print</span> <span class="hljs-string">&quot;Content-Disposition: attachment; filename=\&quot;$id.pfx\&quot;\n\n&quot;</span>;
  <span class="hljs-keyword">print</span> $cert_p12;
</code></pre>

    ]]>
      </content>
    </entry>
  
    
    <entry>
      <title>Things I always need to look up in Perl</title>
      <link href="https://www.kcaran.com/posts/things-i-always-need-to-look-up-in-perl.html"/>
      <published>2009-12-21T00:00:00Z</published>
      <updated>2009-12-21T00:00:00Z</updated>
      <id>https://www.kcaran.com/posts/things-i-always-need-to-look-up-in-perl.html</id>
      <content type="html">
        <![CDATA[
      <p>Here are some random Perl things I always need to look up:</p>
<h4>Print the string representation in hex</h4>
<p>print join( ’ ', map { unpack “H*”, $_ } split( //, $x ) );</p>
<h4>Text replacement on a per-file basis</h4>
<pre><code class="hljs language-perl">perl -pi -e <span class="hljs-string">&#x27;s/\/business\//\/illus\/business.html/&#x27;</span> */*.html
</code></pre>
<ul>
<li>-p : Iterate over each line of the file</li>
<li>-i : Don’t create a backup file</li>
<li>-e : Enter one or more lines of script</li>
</ul>
<h4>Muliple line pattern modifiers:</h4>
<ul>
<li>
<p><code>/s</code> allows wildcards (.) to match a newline.  Use this to extend
a search beyond a single line.</p>
</li>
<li>
<p><code>/m</code> changes the behavior of <code>^</code> and <code>$</code> so they will
match the start and end of any line. <code>/^&amp;lt;h4&gt;/m</code> would match
any line that began with an h4 heading tag.</p>
</li>
<li>
<p>To explicitly match the start and end of the string, use <code>\A</code> and the EOF character, <code>\z</code>.</p>
</li>
<li>
<p>The <code>/s</code> and <code>/m</code> modifiers are not mutually
exclusive.</p>
</li>
</ul>
<h4>The <code>break</code> and <code>continue</code> keywords from C are <code>last</code> and <code>next</code> in Perl.</h4>
<h4>Use localtime to get the current year (assuming post-2000):</h4>
<pre><code class="hljs language-perl"><span class="hljs-comment"># Year is the sixth element of the localtime list</span>
$YEAR = <span class="hljs-number">2000</span> + (( <span class="hljs-keyword">localtime</span> )[<span class="hljs-number">5</span>] % <span class="hljs-number">100</span>);
</code></pre>
<h4>Redirecting STDOUT temporarily to a scalar (string)</h4>
<pre><code class="hljs language-perl"><span class="hljs-comment"># Open a filehandle on a string</span>
<span class="hljs-keyword">my</span> $scalar_file = <span class="hljs-string">&#x27;&#x27;</span>;
<span class="hljs-keyword">open</span> <span class="hljs-keyword">my</span> $scalar_fh, <span class="hljs-string">&#x27;&gt;&#x27;</span>, \$scalar_file
		<span class="hljs-keyword">or</span> <span class="hljs-keyword">die</span> <span class="hljs-string">&quot;Can&#x27;t open scalar filehandle: $!&quot;</span>;

<span class="hljs-comment"># Select scalar filehandle as default, save STDOUT</span>
<span class="hljs-keyword">my</span> $ostdout = <span class="hljs-keyword">select</span>( $scalar_fh );

<span class="hljs-comment"># Unbuffered output</span>
$| = <span class="hljs-number">1</span>;

<span class="hljs-comment"># Now, close scalar filehandle and bring back STDOUT</span>
<span class="hljs-keyword">close</span>( $scalar_fh );

<span class="hljs-keyword">print</span> <span class="hljs-string">&quot;ABC\n&quot;</span>;
<span class="hljs-keyword">print</span> <span class="hljs-string">&quot;DEF\n&quot;</span>;
<span class="hljs-keyword">print</span> <span class="hljs-string">&quot;GHI...\n&quot;</span>;

<span class="hljs-comment"># Bring STDOUT back</span>
<span class="hljs-keyword">select</span>( $ostdout );
</code></pre>
<h4>Slurp an entire file into a scalar</h4>
<pre><code class="hljs language-perl"><span class="hljs-keyword">open</span> <span class="hljs-keyword">my</span> $text_fh, <span class="hljs-string">&#x27;&amp;lt;&#x27;</span>, <span class="hljs-string">&#x27;myfile.txt&#x27;</span> <span class="hljs-keyword">or</span> <span class="hljs-keyword">die</span> $!;
<span class="hljs-keyword">my</span> $contents = <span class="hljs-keyword">do</span> { <span class="hljs-keyword">local</span> $/;  &amp;<span class="hljs-keyword">lt</span>;$text_fh&gt; };
</code></pre>
<h4>Run a function inside of a double-quoted string</h4>
<pre><code class="hljs language-perl"><span class="hljs-keyword">my</span> $input = <span class="hljs-string">qq|&amp;lt;input type=&quot;text&quot; name=&quot;email&quot;
	value=&quot;&lt;b&gt;<span class="hljs-subst">${ \escapeHTML( $email ) }</span>&lt;/b&gt;&quot;&gt;|</span>;
</code></pre>
<h4>Use Data::Dumper to display a data structure</h4>
<pre><code class="hljs language-perl"><span class="hljs-keyword">use</span> Data::Dumper;
<span class="hljs-keyword">warn</span> <span class="hljs-string">&quot;KAC:&quot;</span>, Data::Dumper-&gt;Dump( [$data_structure], [<span class="hljs-string">&#x27;*main::data_structure&#x27;</span>] );
</code></pre>

    ]]>
      </content>
    </entry>
  
    
    <entry>
      <title>VIM Syntax Coloring for Hand Histories</title>
      <link href="https://www.kcaran.com/posts/vim-syntax-coloring-for-hand-histories.html"/>
      <published>2009-01-29T00:00:00Z</published>
      <updated>2009-01-29T00:00:00Z</updated>
      <id>https://www.kcaran.com/posts/vim-syntax-coloring-for-hand-histories.html</id>
      <content type="html">
        <![CDATA[
      <p>
Hand history files, like computer programs, are notoriously difficult to read.
Software developers use syntax coloring to highlight keywords and contrast
different sections of code.  I've developed a syntax definition file for the
<a href="http://www.vim.org">Vim editor</a> that colors both Poker Stars
and Full Tilt Poker hand history files.
</p>
<p>
Installation instructions can be found at the beginning of the file.
Installing the syntax file is fairly straightforward, especially for anyone
who has used Vim before.  Feel free to experiment with the colors, and
let me know if you come up with better.
</p>
<img src="/poker/hhvimsyntax.png">
<h4>
View or download <a href="/poker/handhistory.vim">handhistory.vim</a> hand history syntax coloring for the Vim editor.
</h4>
<!-- more -->

    ]]>
      </content>
    </entry>
  
    
    <entry>
      <title>Writing an Apache Module for RHEL 5</title>
      <link href="https://www.kcaran.com/posts/writing-an-apache-module-for-rhel-5.html"/>
      <published>2009-01-14T00:00:00Z</published>
      <updated>2009-01-14T00:00:00Z</updated>
      <id>https://www.kcaran.com/posts/writing-an-apache-module-for-rhel-5.html</id>
      <content type="html">
        <![CDATA[
      <p>Recently, I was asked by my employer to write an Apache module.  The module reads the requestor’s digital certificate and checks it against our database of active users.  In this post, I’ll explain how to get started writing Apache modules, especially for Red Hat Enterprise Linux 5 (RHEL 5.2).</p>
<div class="imgleft">
<a href="http://www.amazon.com/gp/product/0132409674?ie=UTF8&tag=michelllougeeenv&linkCode=as2&camp=1789&creative=9325&creativeASIN=0132409674"><img border="0" src="/assets/img/51sQph2MYyL._SL160_.jpg"></a>
</div>
<p>The best (and possibly only) useful source of information about writing modules for Apache 2 is Nick Kew’s
<a href="http://www.amazon.com/gp/product/0132409674?ie=UTF8&tag=michelllougeeenv&linkCode=as2&camp=1789&creative=9325&creativeASIN=0132409674">The Apache Modules Book.</a><img src="http://www.assoc-amazon.com/e/ir?t=michelllougeeenv&l=as2&o=1&a=0132409674" width="1" height="1" border="0" alt="" style="border:none !important; margin:0px !important;" /></p>
<p>The first thing you’ll want to do is buy this book.
It is well written, provides lots of examples, and is very thorough.
But even with <i>The Apache Modules Book</i>, you will need to do some exploring in the Apache code to understand how everything works and to apply it to your work.</p>
<p>Currently, RHEL5 ships with Apache 2.2.3 and APR 1.2.7.  APR, the Apache Portable Runtime, provides all the tools and libraries you’ll need to build your own module.  You’ll also need apxs, which is used to compile and install modules.  The apxs binary is the httpd-devel package.  You’ll want to install that before anything else:</p>
<pre><code class="hljs language-bash"><span class="hljs-comment"># yum install httpd-devel</span>
</code></pre>
<p>Also, get the source code directly from <a href="http://apache.org">apache.org</a>
(<a href="http://archive.apache.org/dist/httpd/httpd-2.2.3.tar.gz">http://archive.apache.org/dist/httpd/httpd-2.2.3.tar.gz</a>).<br>
You don’t need to rebuild and reinstall apache, but you definitely will want to peruse the included modules.  I went so far as to add debug statements in some of the modules to learn more about them.  There’s also a terrific template at <code>modules/experimental/mod_example.c</code> to help you get started.</p>
<p>Finally, download the source code for the latest versions of apr and apr-util (1.3.3 and 1.3.4 as of this writing) at
<a href="http://apr.apache.org/download.cgi">http://apr.apache.org/download.cgi</a>.</p>
<p>Like the httpd, you’ll want to be able to view and modify the source code.  But more importantly, the ODBC DBD driver is built-in as of version 1.3.1 of apr-util.  This is a big enough enhancement to upgrade the stock versions used by RHEL 5.2.</p>
<p>Install apr-1.3.3 using</p>
<pre><code class="hljs language-bash"><span class="hljs-comment"># ./configure --prefix=/usr</span>
<span class="hljs-comment"># make</span>
<span class="hljs-comment"># make install</span>
</code></pre>
<p>Install apr-util-1.3.4 using</p>
<pre><code class="hljs language-bash"><span class="hljs-comment"># ./configure --with-ldap --with-apr=/usr/ --prefix=/usr</span>
<span class="hljs-comment"># make</span>
<span class="hljs-comment"># make install</span>
</code></pre>
<p>You now have everything you need to start writing your own Apache module!  Use the apxs utility to compile and install it:</p>
<p>Compile and install mod_safeca:</p>
<pre><code class="hljs language-bash"><span class="hljs-comment"># apxs -c mod_safeca.c</span>
<span class="hljs-comment"># apxs -i mod_safeca.la </span>
</code></pre>
<p>Restart httpd</p>
<pre><code class="hljs language-bash"><span class="hljs-comment"># service httpd restart</span>
</code></pre>

    ]]>
      </content>
    </entry>
  
    
    <entry>
      <title>Perl Modules Primer</title>
      <link href="https://www.kcaran.com/posts/perl-modules-primer.html"/>
      <published>2005-09-26T00:00:00Z</published>
      <updated>2005-09-26T00:00:00Z</updated>
      <id>https://www.kcaran.com/posts/perl-modules-primer.html</id>
      <content type="html">
        <![CDATA[
      <p>Splitting a Perl application into seperate files can be trickier than
doing it in other languages, like C or C++, but it is still an
important part of producing maintainable code.</p>
<h2>Creating the Package</h2>
<p>A Perl <b>module</b> is a collection of code stored in a single file.
By definition, all variables and function names in the module are
stored in a <b>package</b> with the same name as the file.</p>
<p>For example, a module named <b>Cgiutils</b> would be stored in the file
<b>Cgiutils.pm</b>.  Any functions or variables in the module belongs
to the <b>Cgiutils</b> package namespace.  The beginning of the file
should look like this:</p>
<!-- more -->
<pre><code class="hljs language-perl"><span class="hljs-comment">#!/usr/bin/perl</span>
<span class="hljs-comment">#</span>
<span class="hljs-comment"># Cgiutils.pm - various debugging utilities for the CGI.pm module and other</span>
<span class="hljs-comment">#		CGI scripts.</span>
<span class="hljs-comment">#</span>

<span class="hljs-keyword">package</span> Cgiutils;

<span class="hljs-keyword">use</span> strict;
<span class="hljs-keyword">use</span> warnings;
</code></pre>
<h2>Accessing Package Variables</h2>
<p>To access a function or a variable declared in <b>Cgiutils</b>, you first
need to tell the main program to import the module with the <b>use</b>
command.  Then, the module’s code can be accessed by prefixing the
module name, <b>Cgiutils::</b> to its functions and variables.</p>
<pre><code class="hljs language-perl"><span class="hljs-keyword">use</span> Cgiutils;

<span class="hljs-keyword">my</span> $ip = $Cgiutils::ip_address();
</code></pre>
<p>If it is too much of a hassle to type out the fully qualified
names of the module’s functions and variables, you can export them
from the module with the following code:</p>
<pre><code class="hljs language-perl"><span class="hljs-comment">#!/usr/bin/perl</span>
<span class="hljs-comment">#</span>
<span class="hljs-comment"># Cgiutils.pm</span>
<span class="hljs-comment">#</span>

<span class="hljs-keyword">package</span> Cgiutils;

<span class="hljs-keyword">use</span> strict;
<span class="hljs-keyword">use</span> warnings;

<span class="hljs-keyword">use</span> Exporter;
<span class="hljs-keyword">our</span> (@ISA, @EXPORT);
@ISA = <span class="hljs-string">qw( Exporter )</span>;
@EXPORT = <span class="hljs-string">qw( &amp;amp;ip_address $cgi_debug %cgi_hash )</span>;

<span class="hljs-keyword">our</span> $cgi_debug;
<span class="hljs-keyword">our</span> %cgi_hash;
</code></pre>
<p>Note that any variables that are exported <i>must</i> be declared
using <b>our</b> instead of <b>my</b>.  This gives the main program
access to those variables.</p>
<h2>Using Global Variables in the Package</h2>
<p>Global variables are the bane of neat and organized code, but
they can be unavoidable in Perl.  Here’s how to use them in
modules.</p>
<p>In your main program, declare the variables to be global:</p>
<pre><code class="hljs language-perl"><span class="hljs-keyword">use</span> strict;

<span class="hljs-comment"># Define these variables as globals... **DO NOT USE &#x27;my $xxx&#x27; with these!**</span>
<span class="hljs-keyword">use</span> vars <span class="hljs-string">qw($chosen_sort $sort_order $sort_type)</span>;
</code></pre>
<p>The module can now use these variables with the default main package.<br>
<b>Warning:</b> make sure that you don’t try to declare them again
with ‘my’ later on in the program!.</p>
<pre><code class="hljs language-perl"><span class="hljs-keyword">print</span> <span class="hljs-string">&quot;The chosen sort is &quot;</span>, $::chosen_sort, <span class="hljs-string">&quot;\n&quot;</span>;
</code></pre>
<h2>Adding sort routines to modules</h2>
<p>Finally, a word on moving sort routines into modules.  If the sort
routine inside the module will be used in the main program, make sure you
use $::a and $::b for the sort variables.</p>
<pre><code class="hljs language-perl"><span class="hljs-comment"># Sort subroutine located in a module and called from the main program</span>
<span class="hljs-function"><span class="hljs-keyword">sub</span> <span class="hljs-title">sort_by_field</span>()
 </span>{
  <span class="hljs-keyword">my</span> $a_val = $::a-&gt;{ $::chosen_sort };
  <span class="hljs-keyword">my</span> $b_val = $::b-&gt;{ $::chosen_sort };
  <span class="hljs-keyword">my</span> $ret_val;

  <span class="hljs-comment"># Determine how to compare based on the chosen field&#x27;s type</span>
  $ret_val = $a_val &lt;=&gt; $b_val;

  <span class="hljs-keyword">return</span> ($ret_val);
 }
</code></pre>
<h2>Sample Programs</h2>
<p>Here’s a sample main program and module:</p>
<h3><a href="http://modmain.pl">modmain.pl</a></h3>
<pre><code class="hljs language-perl"><span class="hljs-comment">#!/usr/bin/perl</span>
<span class="hljs-comment">#</span>
<span class="hljs-comment"># modmain.pl</span>
<span class="hljs-comment">#</span>
<span class="hljs-comment"># Testing main program for relationship between a</span>
<span class="hljs-comment"># main program and a module</span>
<span class="hljs-comment">#</span>
<span class="hljs-keyword">use</span> strict;
<span class="hljs-keyword">use</span> warnings;

<span class="hljs-keyword">use</span> modmodule;

<span class="hljs-keyword">use</span> vars <span class="hljs-string">qw( $global_var )</span>;

$global_var = <span class="hljs-number">5</span>;

<span class="hljs-keyword">print</span> <span class="hljs-string">&quot;The module_var = $module_var\n\n&quot;</span>;
module_func();
</code></pre>
<h3><a href="http://modmodule.pm">modmodule.pm</a></h3>
<pre><code class="hljs language-perl"><span class="hljs-comment">#!/usr/bin/perl</span>
<span class="hljs-comment">#</span>
<span class="hljs-comment"># modmodule.pm</span>
<span class="hljs-comment">#</span>
<span class="hljs-comment"># Testing module for relationship between a main program</span>
<span class="hljs-comment"># and a module</span>
<span class="hljs-comment">#</span>

<span class="hljs-keyword">package</span> modmodule;

<span class="hljs-keyword">use</span> strict;
<span class="hljs-keyword">use</span> warnings;

<span class="hljs-keyword">use</span> Exporter;
<span class="hljs-keyword">our</span> ( @ISA, @EXPORT );
@ISA = <span class="hljs-string">qw( Exporter )</span>;
@EXPORT = <span class="hljs-string">qw( &amp;amp;module_func $module_var )</span>;

<span class="hljs-keyword">our</span> $module_var = <span class="hljs-number">34</span>;           <span class="hljs-comment"># <span class="hljs-doctag">NOTE:</span> Can&#x27;t use &#x27;my&#x27; here!</span>

<span class="hljs-function"><span class="hljs-keyword">sub</span> <span class="hljs-title">module_func</span> </span>{
	<span class="hljs-keyword">print</span> <span class="hljs-string">&quot;Calling module_func()...\n&quot;</span>;
	<span class="hljs-keyword">print</span> <span class="hljs-string">&quot;The global_var = $::global_var\n&quot;</span>;
}
</code></pre>

    ]]>
      </content>
    </entry>
  
    
    <entry>
      <title>A Template Post / Style Guide</title>
      <link href="https://www.kcaran.com/posts/a-template-post-style-guide.html"/>
      <published>2000-01-01T00:00:00Z</published>
      <updated>2000-01-01T00:00:00Z</updated>
      <id>https://www.kcaran.com/posts/a-template-post-style-guide.html</id>
      <content type="html">
        <![CDATA[
      <h2>This is an H2 Heading</h2>
<p>From <a href="https://www.moby-dipsum.com/">Moby Dipsum</a>…</p>
<p>Call me Ishmael. Some years ago—never mind how long precisely—having little or no money in my purse, and nothing particular to interest me on shore, I thought I would sail about a little and see the watery part of the world. It is a way I have of driving off the spleen and regulating the circulation.</p>
<p>Whenever I find myself growing grim about the mouth; whenever it is a damp, drizzly November in my soul; whenever I find myself involuntarily pausing before coffin warehouses, and bringing up the rear of every funeral I meet; and especially whenever my hypos get such an upper hand of me, that it requires a strong moral principle to prevent me from deliberately stepping into the street, and methodically knocking people’s hats off—then, I account it high time to get to sea as soon as I can. This is my substitute for pistol and ball. With a philosophical flourish Cato throws himself upon his sword; I quietly take to the ship. There is nothing surprising in this. If they but knew it, almost all men in their degree, some time or other, cherish very nearly the same feelings towards the ocean with me.</p>
<h3>This is an H3 Heading</h3>
<p>So far as what there may be of a narrative in this book; and, indeed, as indirectly touching one or two very interesting and curious particulars in the habits of sperm whales, the foregoing chapter, in its earlier part, is as important a one as will be found in this volume; but the leading matter of it requires to be still further and more familiarly enlarged upon, in order to be adequately understood, and moreover to take away any incredulity which a profound ignorance of the entire subject may induce in some minds, as to the natural verity of the main points of this affair.</p>
<p>I care not to perform this part of my task methodically; but shall be content to produce the desired impression by separate citations of items, practically or reliably known to me as a whaleman; and from these citations, I take it—the conclusion aimed at will naturally follow of itself.</p>
<h4>This is an H4 Heading</h4>
<p>“Nothing, sir.”</p>
<p>“Nothing! and noon at hand! The doubloon goes a-begging! See the sun! Aye, aye, it must be so. I’ve oversailed him. How, got the start? Aye, he’s chasing me now; not I, him—that’s bad; I might have known it, too. Fool! the lines—the harpoons he’s towing. Aye, aye, I have run him by last night. About! about! Come down, all of ye, but the regular look outs! Man the braces!”</p>
<p>Steering as she had done, the wind had been somewhat on the Pequod’s quarter, so that now being pointed in the reverse direction, the braced ship sailed hard upon the breeze as she rechurned the cream in her own white wake.</p>
<p>“Against the wind he now steers for the open jaw,” murmured Starbuck to himself, as he coiled the new-hauled main-brace upon the rail. “God keep us, but already my bones feel damp within me, and from the inside wet my flesh. I misdoubt me that I disobey my God in obeying him!”</p>

    ]]>
      </content>
    </entry>
  
</feed>
